What is a .STEP File?
At its core, a .STEP file, short for Standard for the Exchange of Product Data, is a standardized format used for the exchange of 3D product data across various software applications.
It serves as a universal language that allows different 3D modelling tools and most CAD programs ( and their own various file types and formats) to communicate seamlessly with each other.
For more information about this file format, visit our complete blog on what is a STEP file.
Key characteristics of the .STEP file format
1. Compatibility: One of the standout features of .STEP files is their remarkable compatibility. These files can be read and manipulated by a wide array of 3D modeling and CAD programs, transcending the barriers of proprietary formats.
Whether you’re using SolidWorks, AutoCAD, or Blender, .STEP files offer a bridge that ensures your 3D models remain accessible and editable across different platforms.
2. Data Integrity: STP files preserve the integrity of your 3D models.
They encapsulate not only the geometry but also the assembly structure, materials, and metadata, ensuring that all essential details are retained during the exchange process.
3. Facilitating Collaboration: In a world where collaboration is often a cornerstone of innovation, .STEP files shine as a collaborative tool.
They enable engineers, designers, and artists to share their creations seamlessly, allowing for productive cross-disciplinary teamwork.
Significance of exporting .STEP Files from SolidWorks
Exporting .STEP files from SolidWorks is a vital step in the 3D design and engineering world. These files, with their universal compatibility, simplify collaboration among diverse teams and applications.
They also enable immersive 3D visualizations, ensure precision in manufacturing, and offer long-term data security, making them an essential asset in modern design workflows.
How to export a .STEP file into SolidWorks in 3 steps
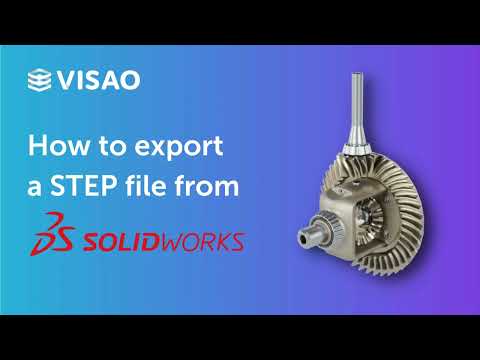
Looking for a concise visual reference? Look no further! Explore our video recap summarizing the three crucial steps for seamless exporting.
Step 1: Applying Materials and Organizing Your Model
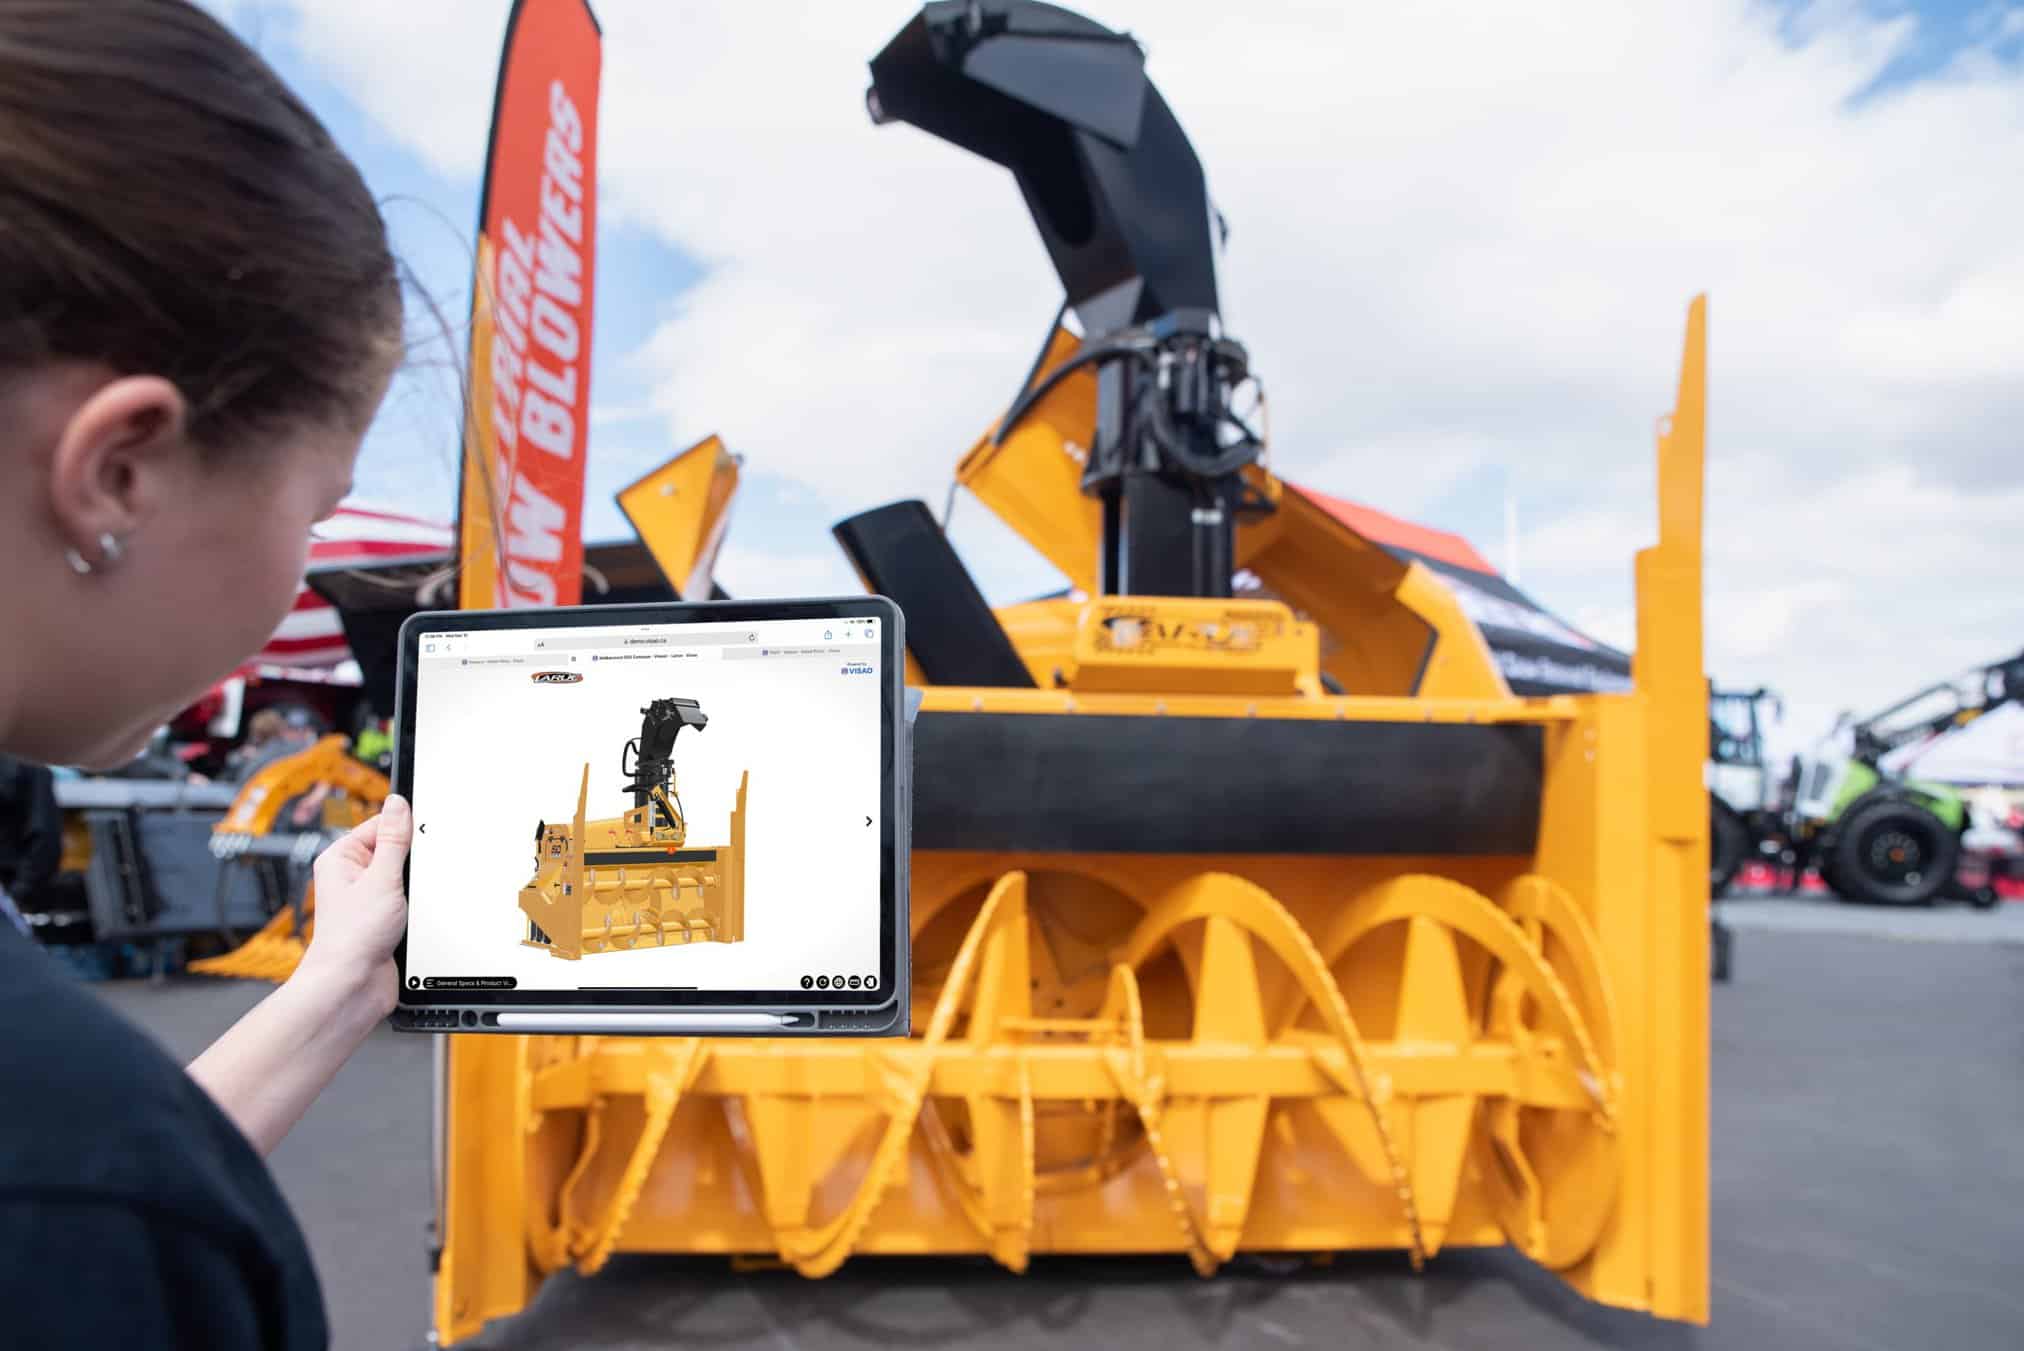
Creating a well-organized and visually appealing SolidWorks model is the crucial first step in the process of exporting a .STEP file for use on Visao’s 3D platform.
This step not only enhances the aesthetics of your model but also ensures a smoother experience for your viewers.
Here’s how to go about it:
A. Apply Materials to Your Model
1. Start by selecting individual components or surfaces of your SolidWorks model.
2. Apply appropriate materials to each component. This step helps in simulating realistic textures and appearances.
3. Consider assigning materials that closely resemble the actual physical properties of the parts, as this will make your model more informative and visually engaging.
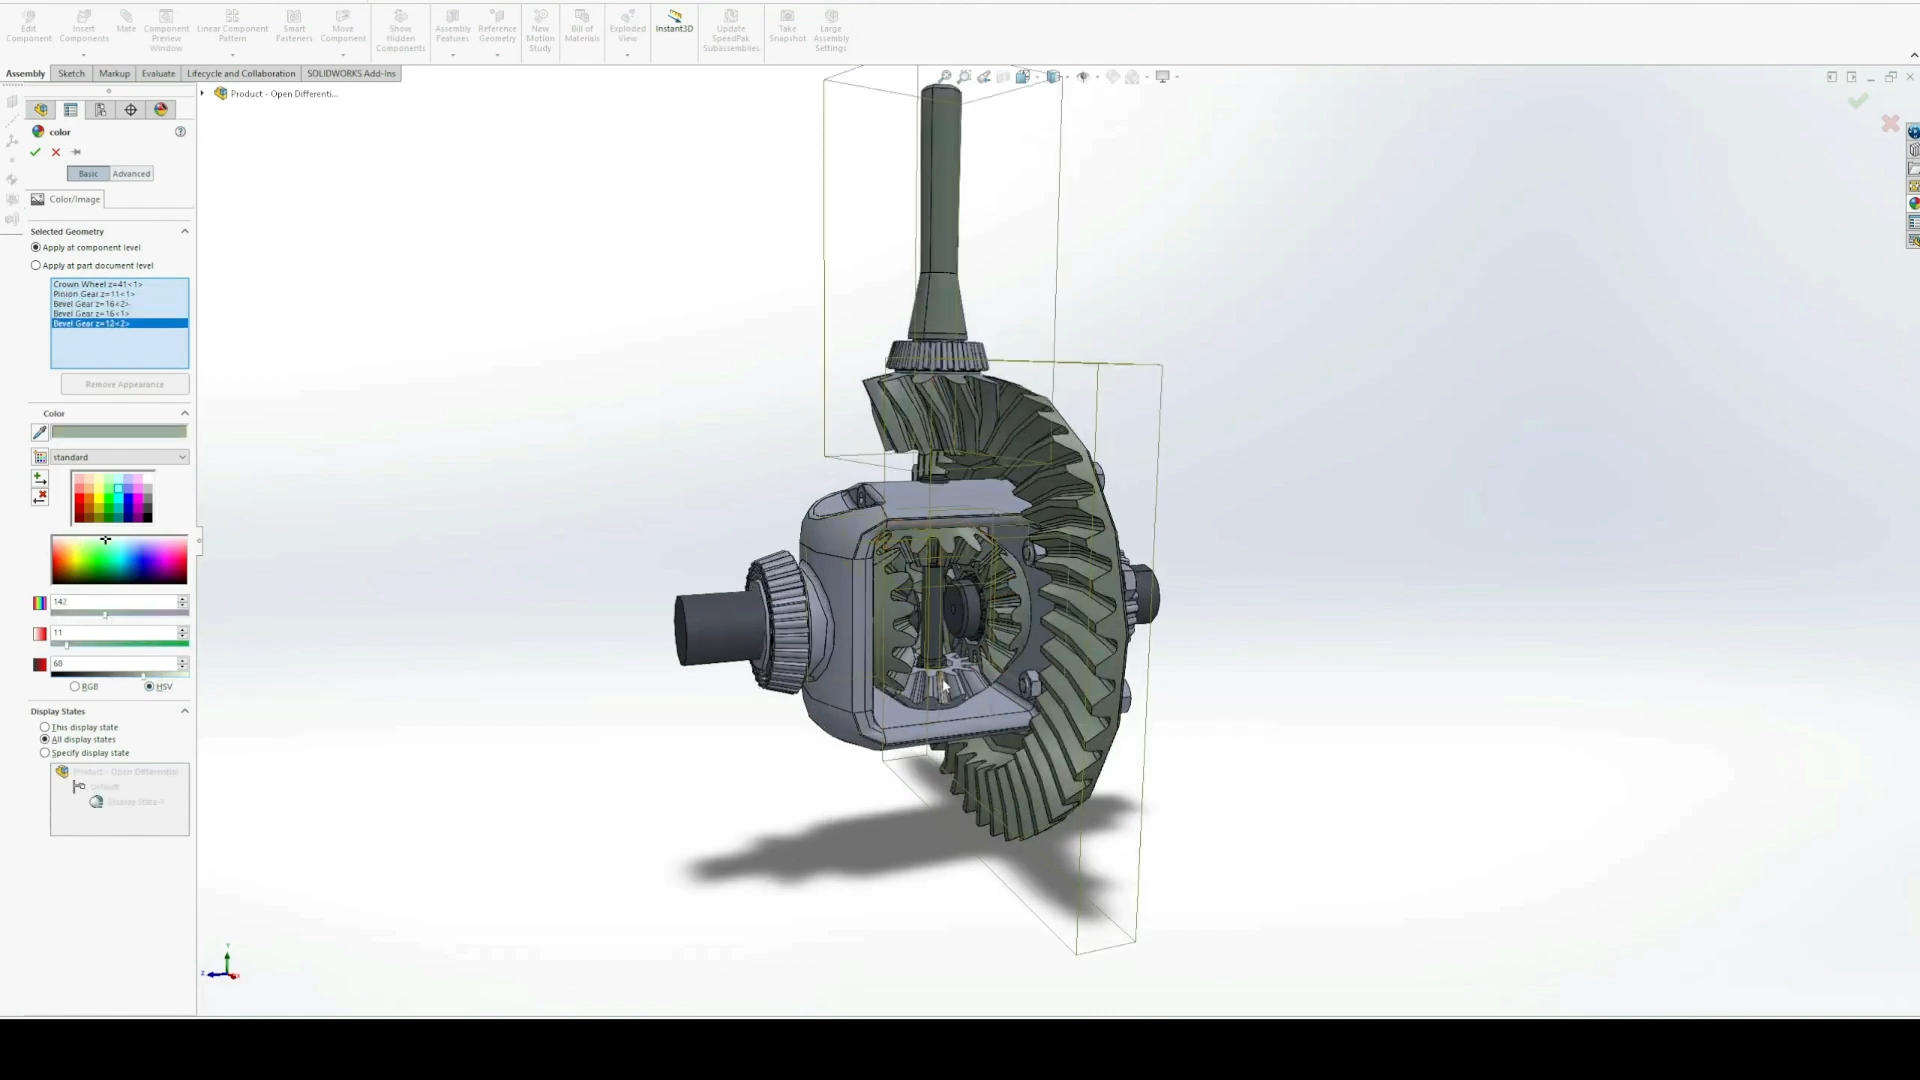
B. Group Parts with the Same Color Together
1. For better organization, group together parts that share the same color or material. This simplifies the navigation and understanding of the model, especially when dealing with complex assemblies (no need for separate STEP files)
2. SolidWorks allows you to assign colors to individual components or faces within the assembly. Use this feature to your advantage.
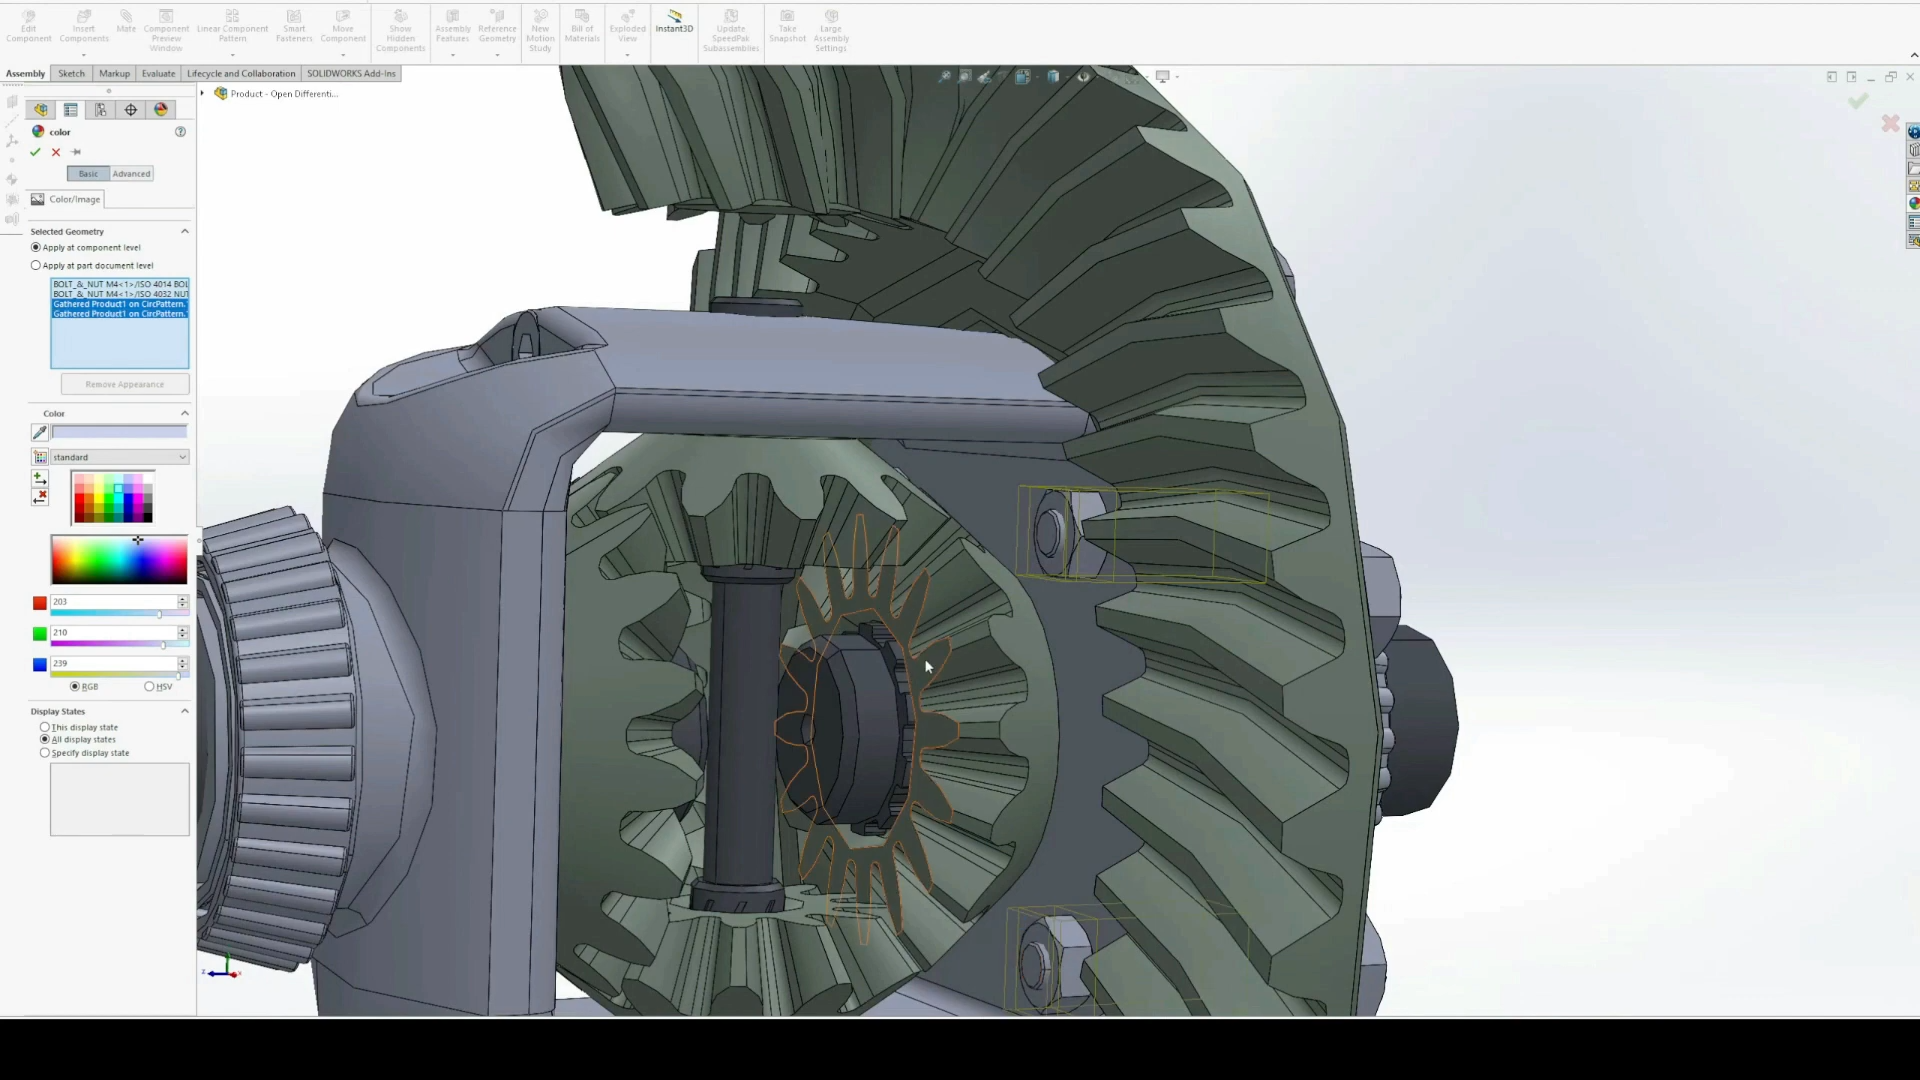
3. By grouping parts with similar colors, you create a logical structure within your model, making it easier for viewers to identify and interact with various components.
Step 2: Navigating to the Export Option
1. In SolidWorks, navigate to the top menu bar. You’ll find the export option under “File.”
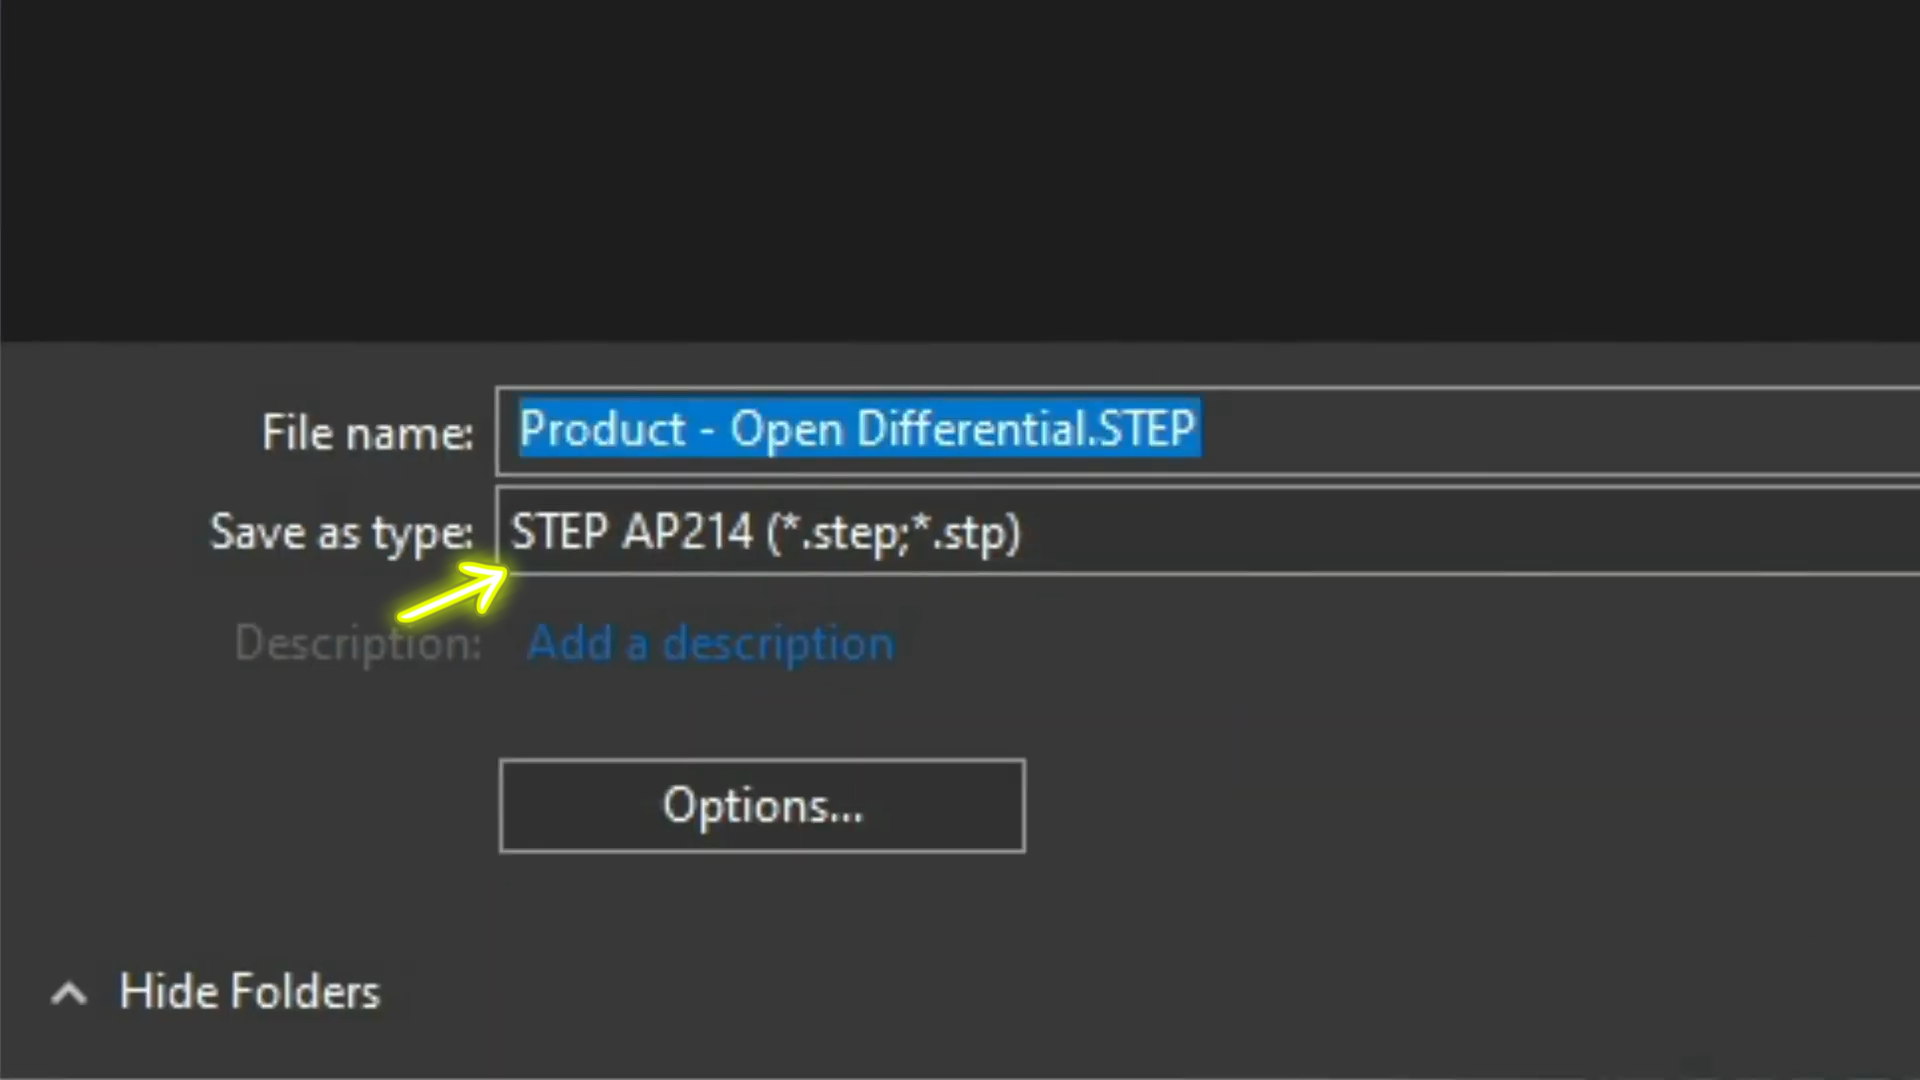
2. Click on “File,” and a dropdown menu will appear. Within this menu, select “Export As.”
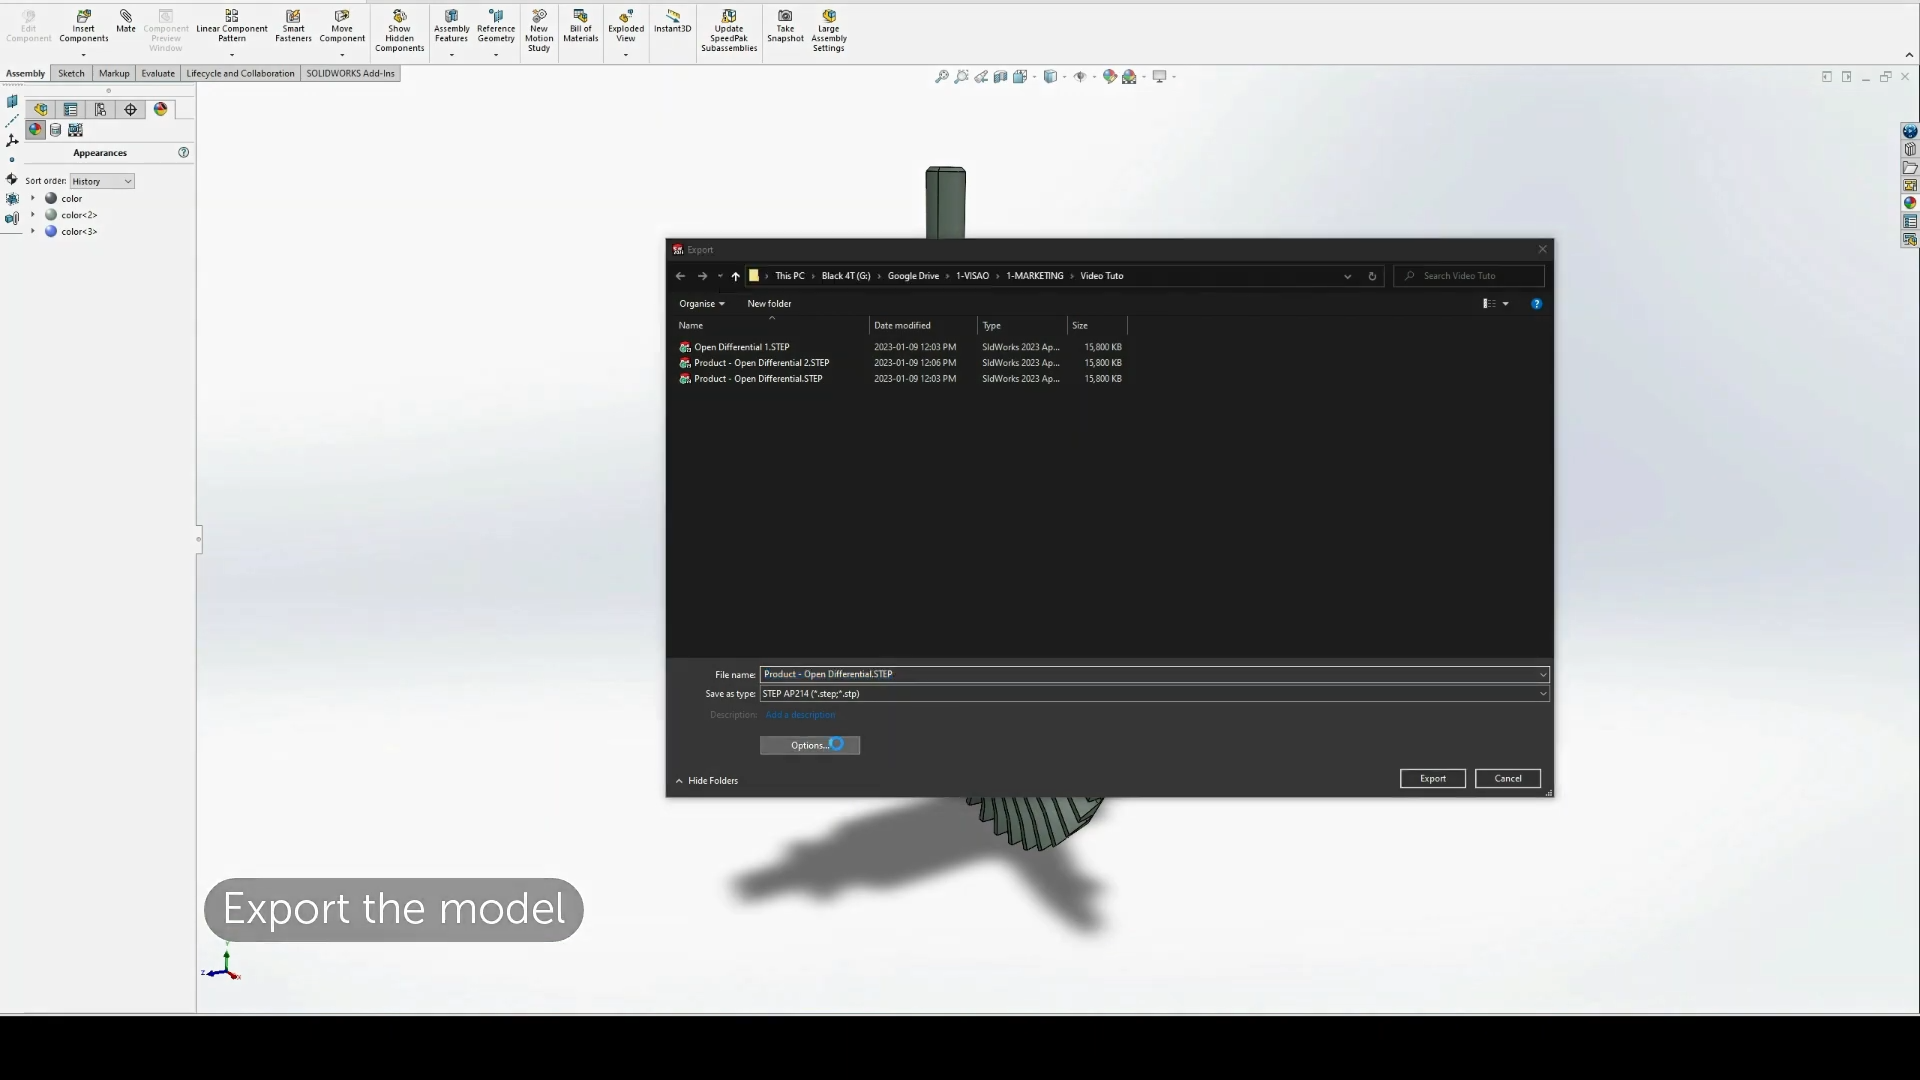
3. Be sure to choose “STEP AP214 (.step;.stp)” as the specific .STEP file type. This step format ensures compatibility with Visao’s 3D platform and maintains the integrity of your model during export.
Step 3: Setting Export Parameters
1. Look for an “Options” at the bottom of the pop-up.

2. Within the export options dialog, you’ll find various settings and preferences. Make sure to:
– Enable the checkbox for “On export, face/edge properties” to retain important information about your model’s geometry.
– Enable the checkbox for “Export appearances” to preserve the visual properties, such as colors and textures.
– Check the option for “Split periodic faces” if your model contains periodic features that should be accurately represented in the .STEP file.
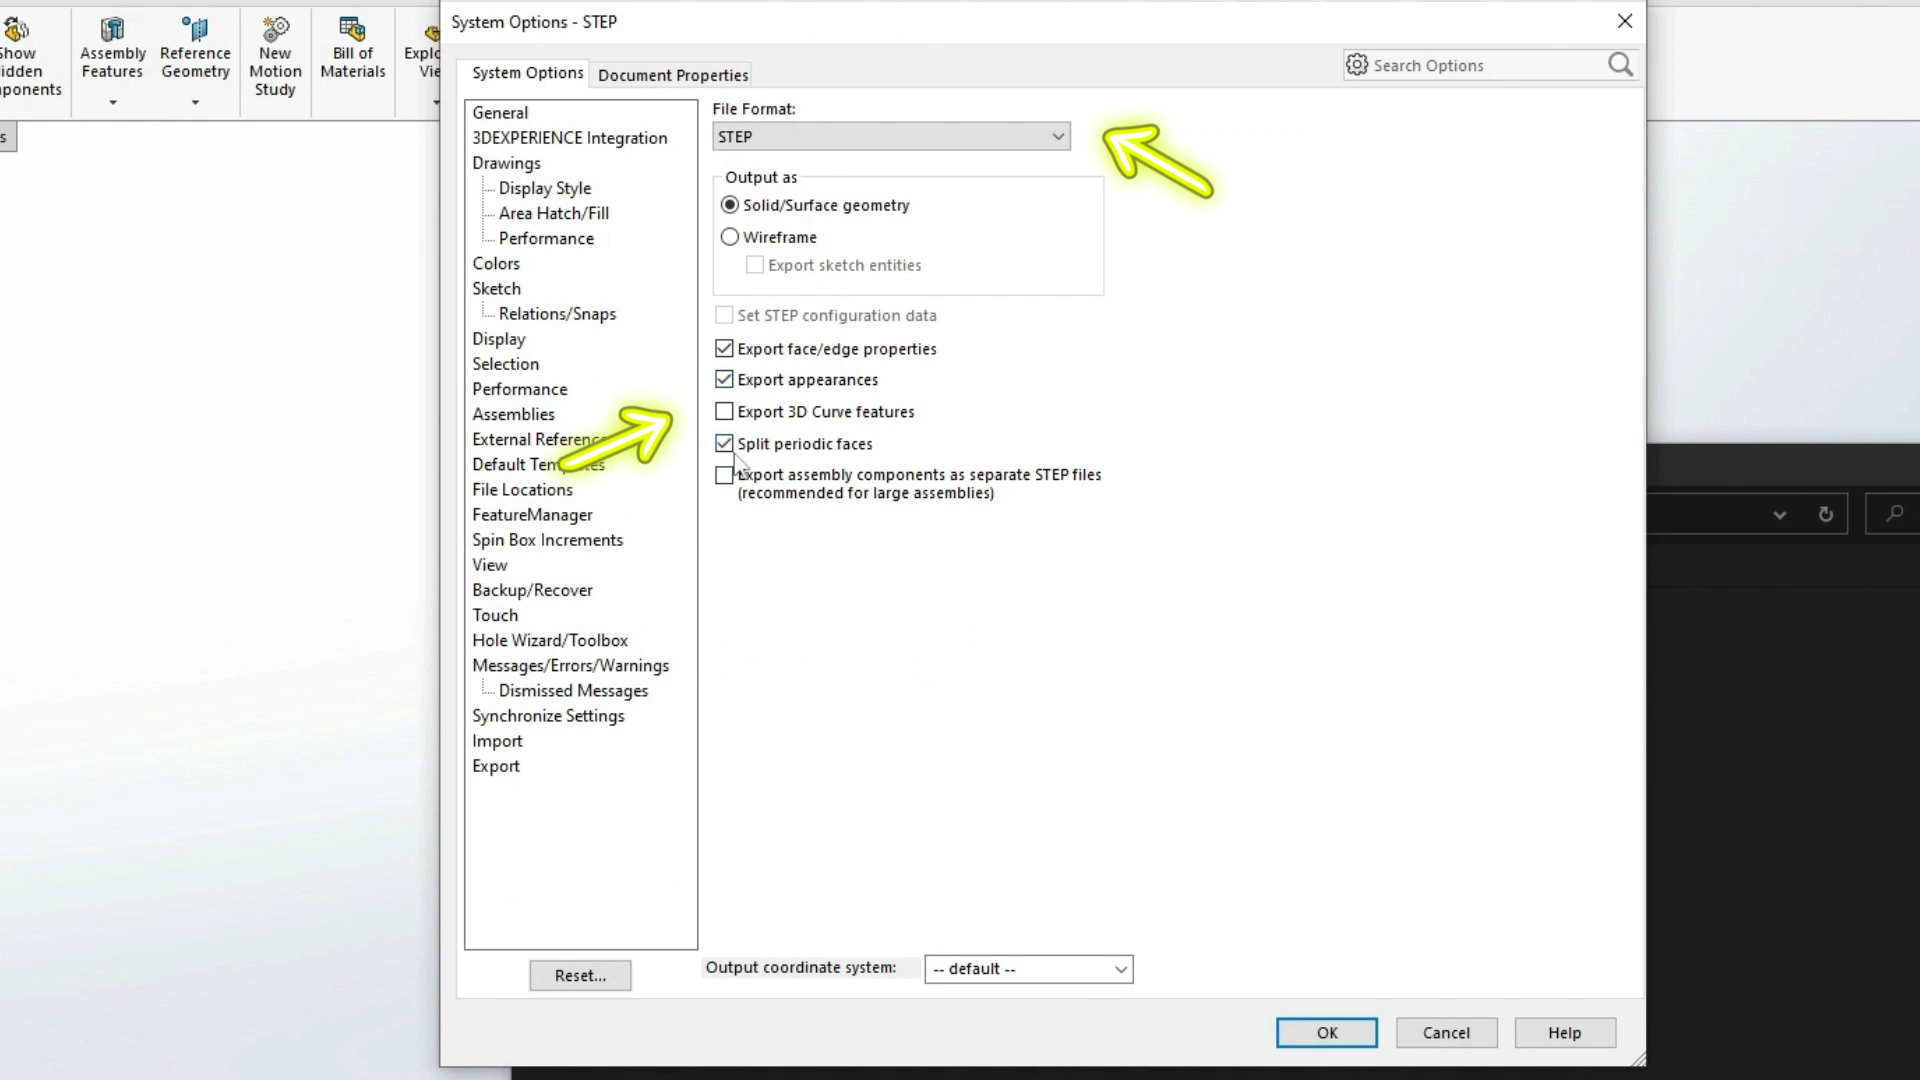
3. After configuring the export parameters to your satisfaction, click on the “OK” button to initiate the export process.
By following these steps and adhering to the provided tips, you’ll ensure a smooth and accurate export process for your SolidWorks model, improve export performance and making it ready for use on Visao’s 3D platform.
Extra tips
1. Choose an appropriate file name and location for your exported Solidworks file. Including the name of your product in the file name makes it easy to identify later.
2. Consider creating a dedicated folder for your exported files to maintain organization and ease of access.
3. Always keep a backup of your exported files in a separate location to prevent data loss or accidental overwrites.
Need SolidWorks expert help?
With your .STEP file successfully exported, SolidWorks users gain access to a valuable asset, primed for use in modeling, mesh data manipulation, animation, or any creative endeavour facilitated by Blender.
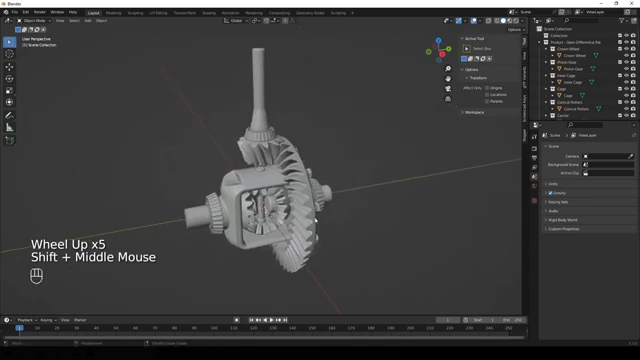
The potential is limitless, and your exploration of the 3D design and visualization realm has just taken a significant stride forward.
Visao provides in-house SolidWorks specialists who stand ready to aid you with your 3D visualization requirements, particularly with step model files, acting as your trusted CAD software advisors.
Furthermore, our web platform empowers web-based visualization of your .STEP files, making them exceptionally well-suited for marketing, sales, and training purposes.