Enhance the visual appeal of your presentations by incorporating interactive 3D elements! In this guide, we’ll walk you through the simple steps to seamlessly add a web-hosted 3D viewer to your PowerPoint presentations.
Get ready to captivate your audience with stunning visuals and animations that go beyond pictures and videos.
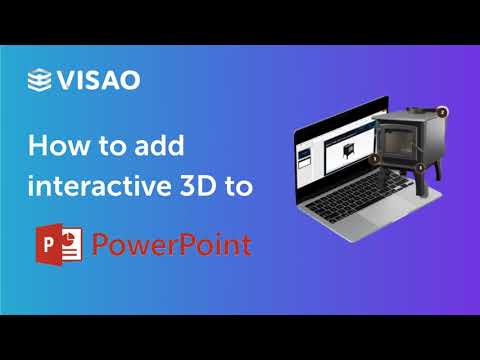
Dont feel like reading? Here is a video recap of all the steps to embedding your 3D viewer on PowerPoint:
Step 1: Open PowerPoint and Navigate to the Add-Ins Tab
Begin by launching Microsoft PowerPoint and opening your presentation. Head over to the “Files” tab, then select the “Get Add-Ins” option.
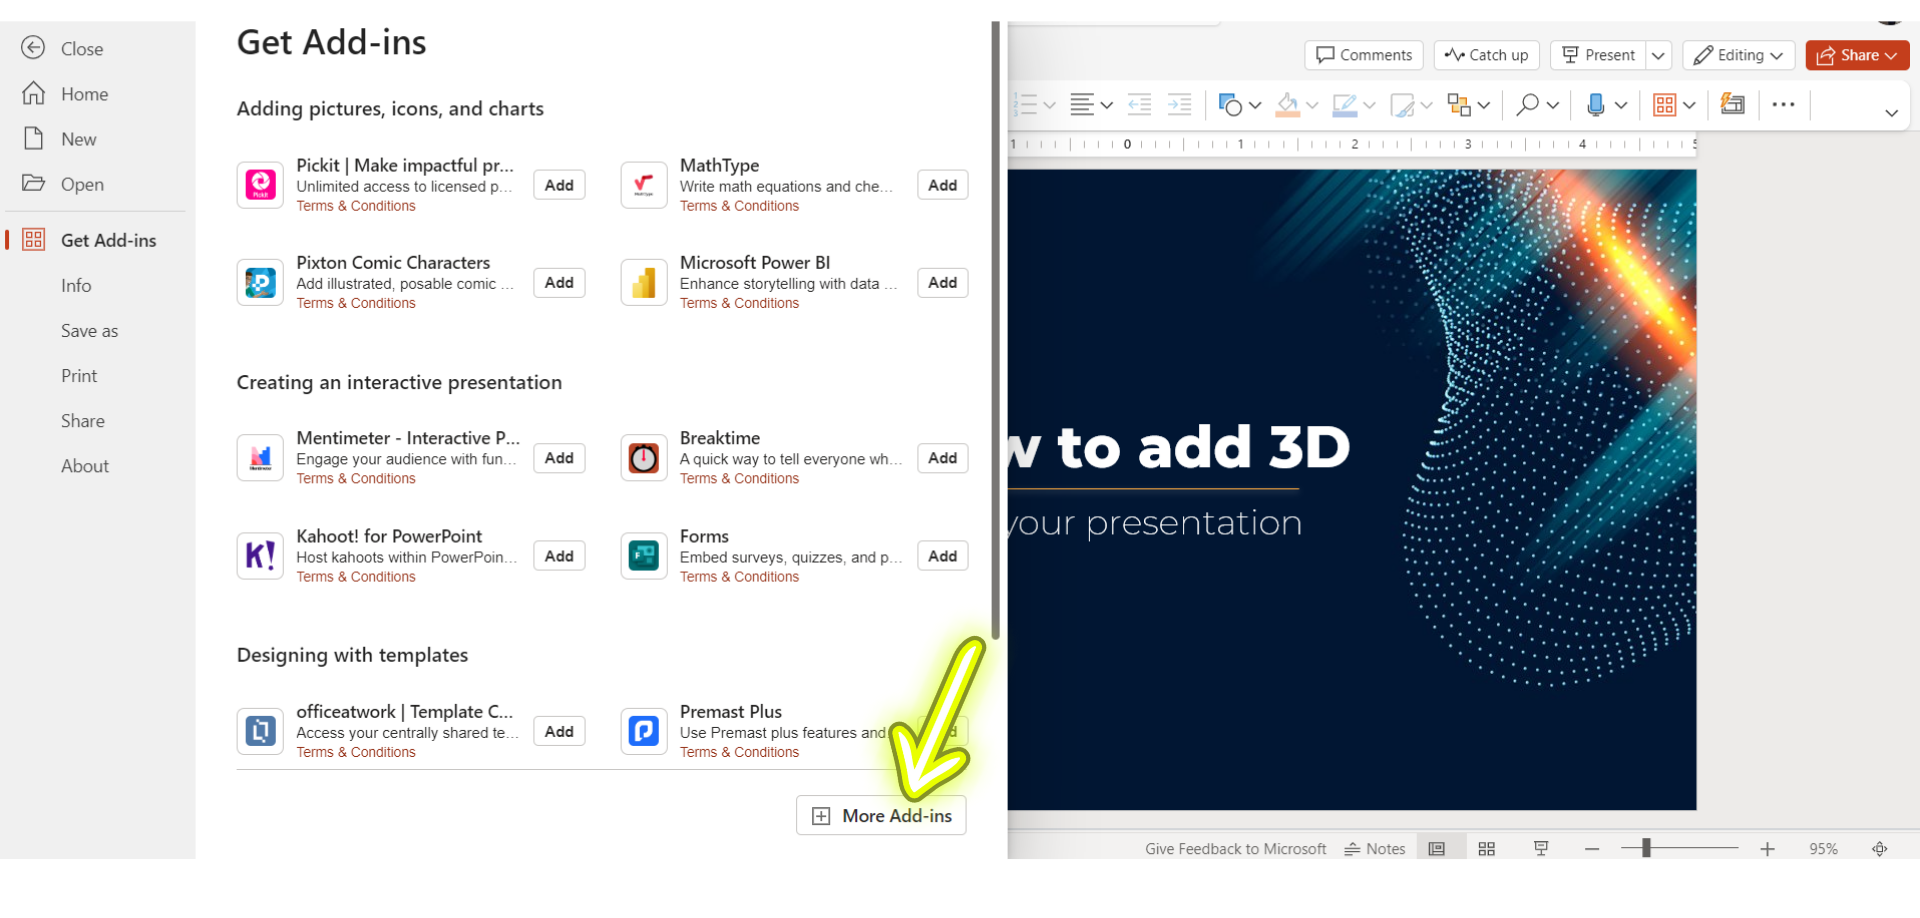
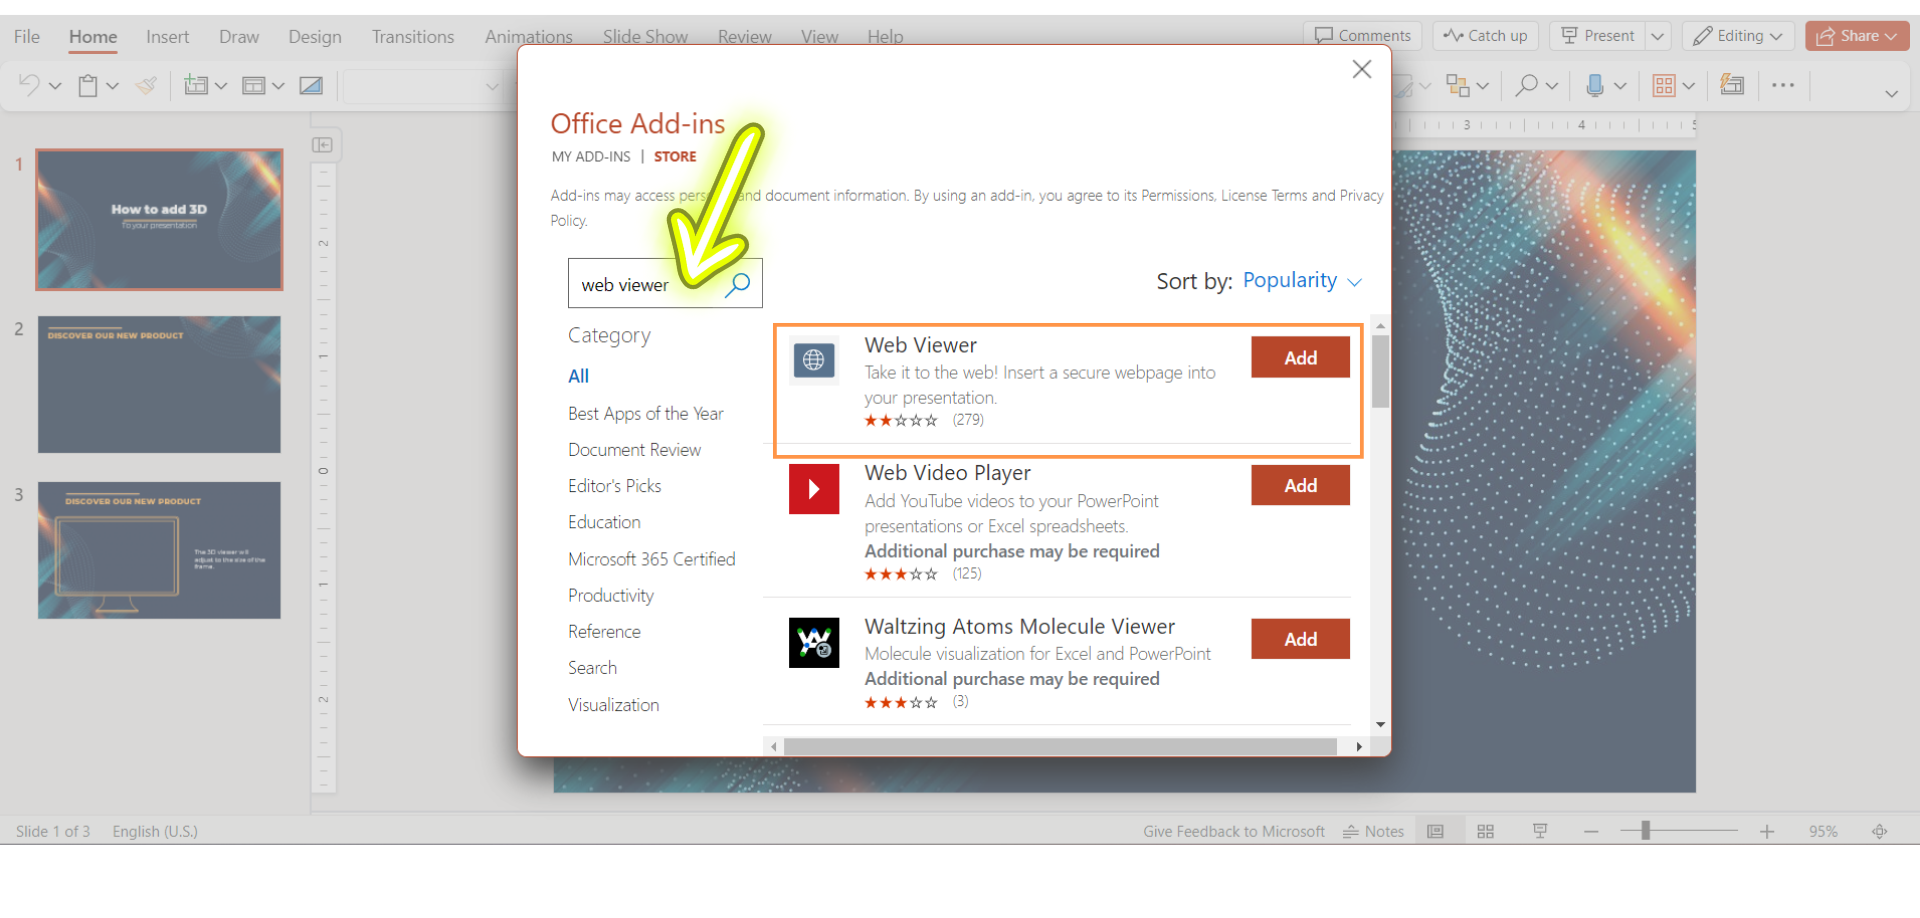
Step 2: Search and Install ‘Web Viewer’
In the Add-Ins tab, locate the search bar and type ‘Web Viewer.’ Once you find it, click on the ‘Add’ button to integrate the extension feature into your PowerPoint application.
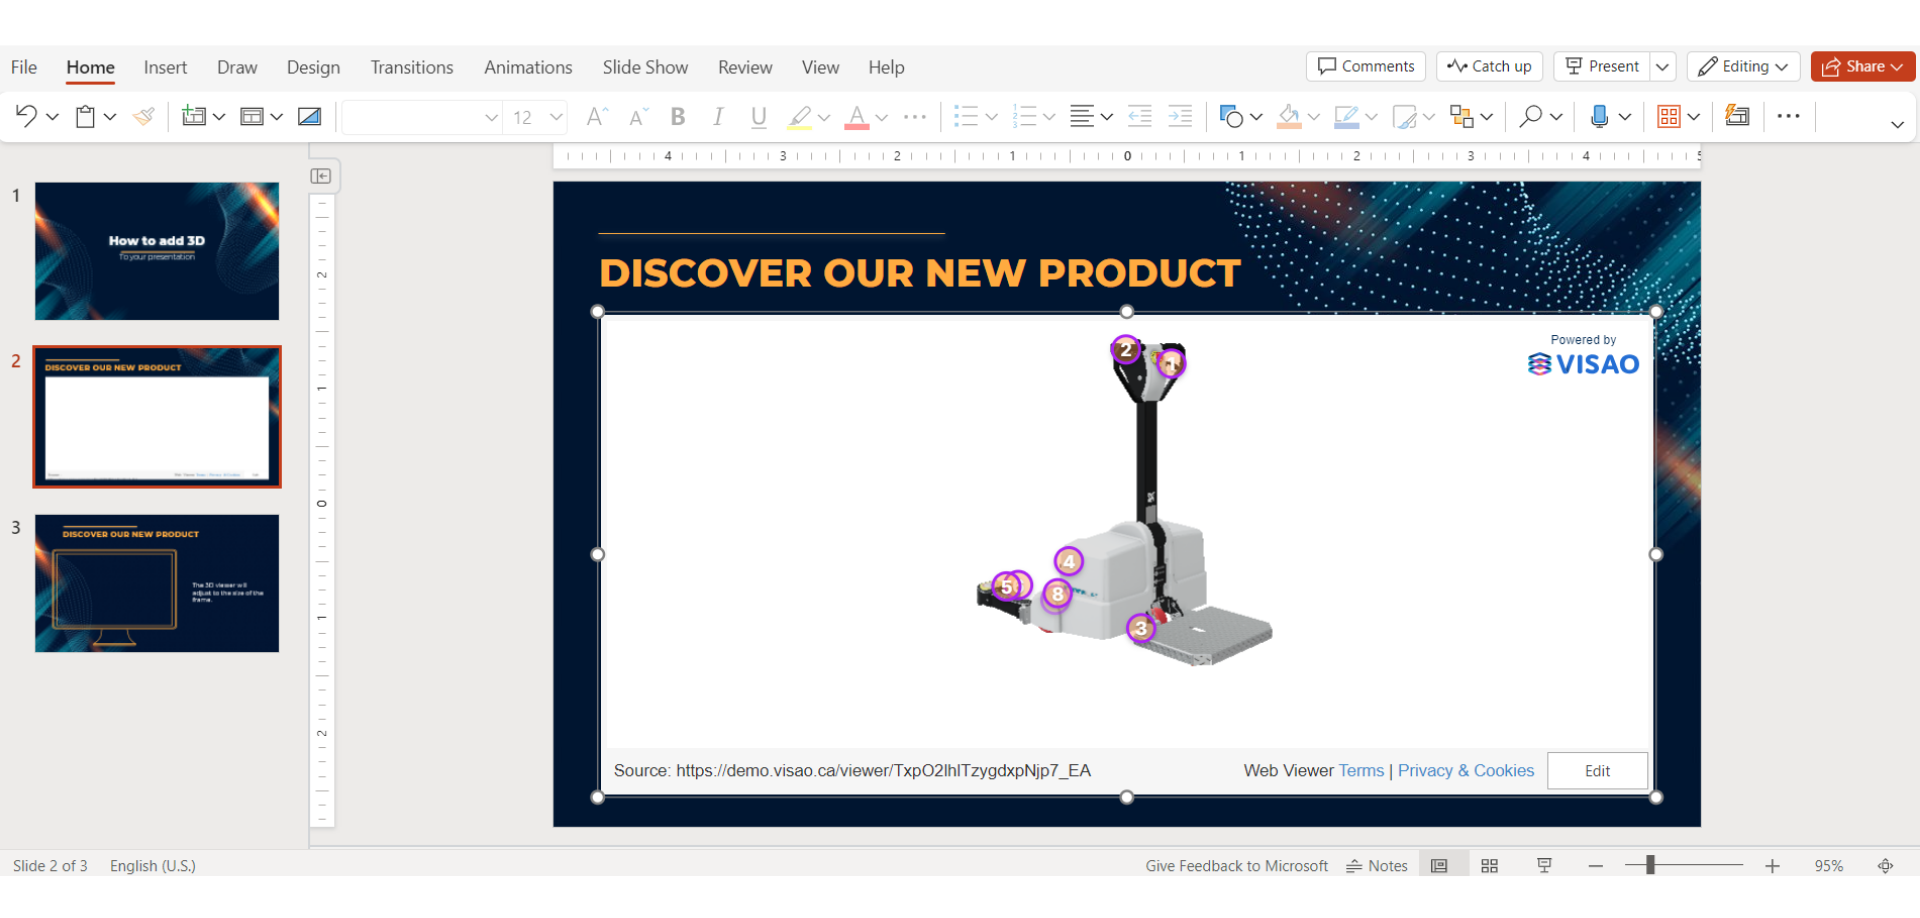
Step 3: Select the PowerPoint Slide and Embed the 3D Viewer
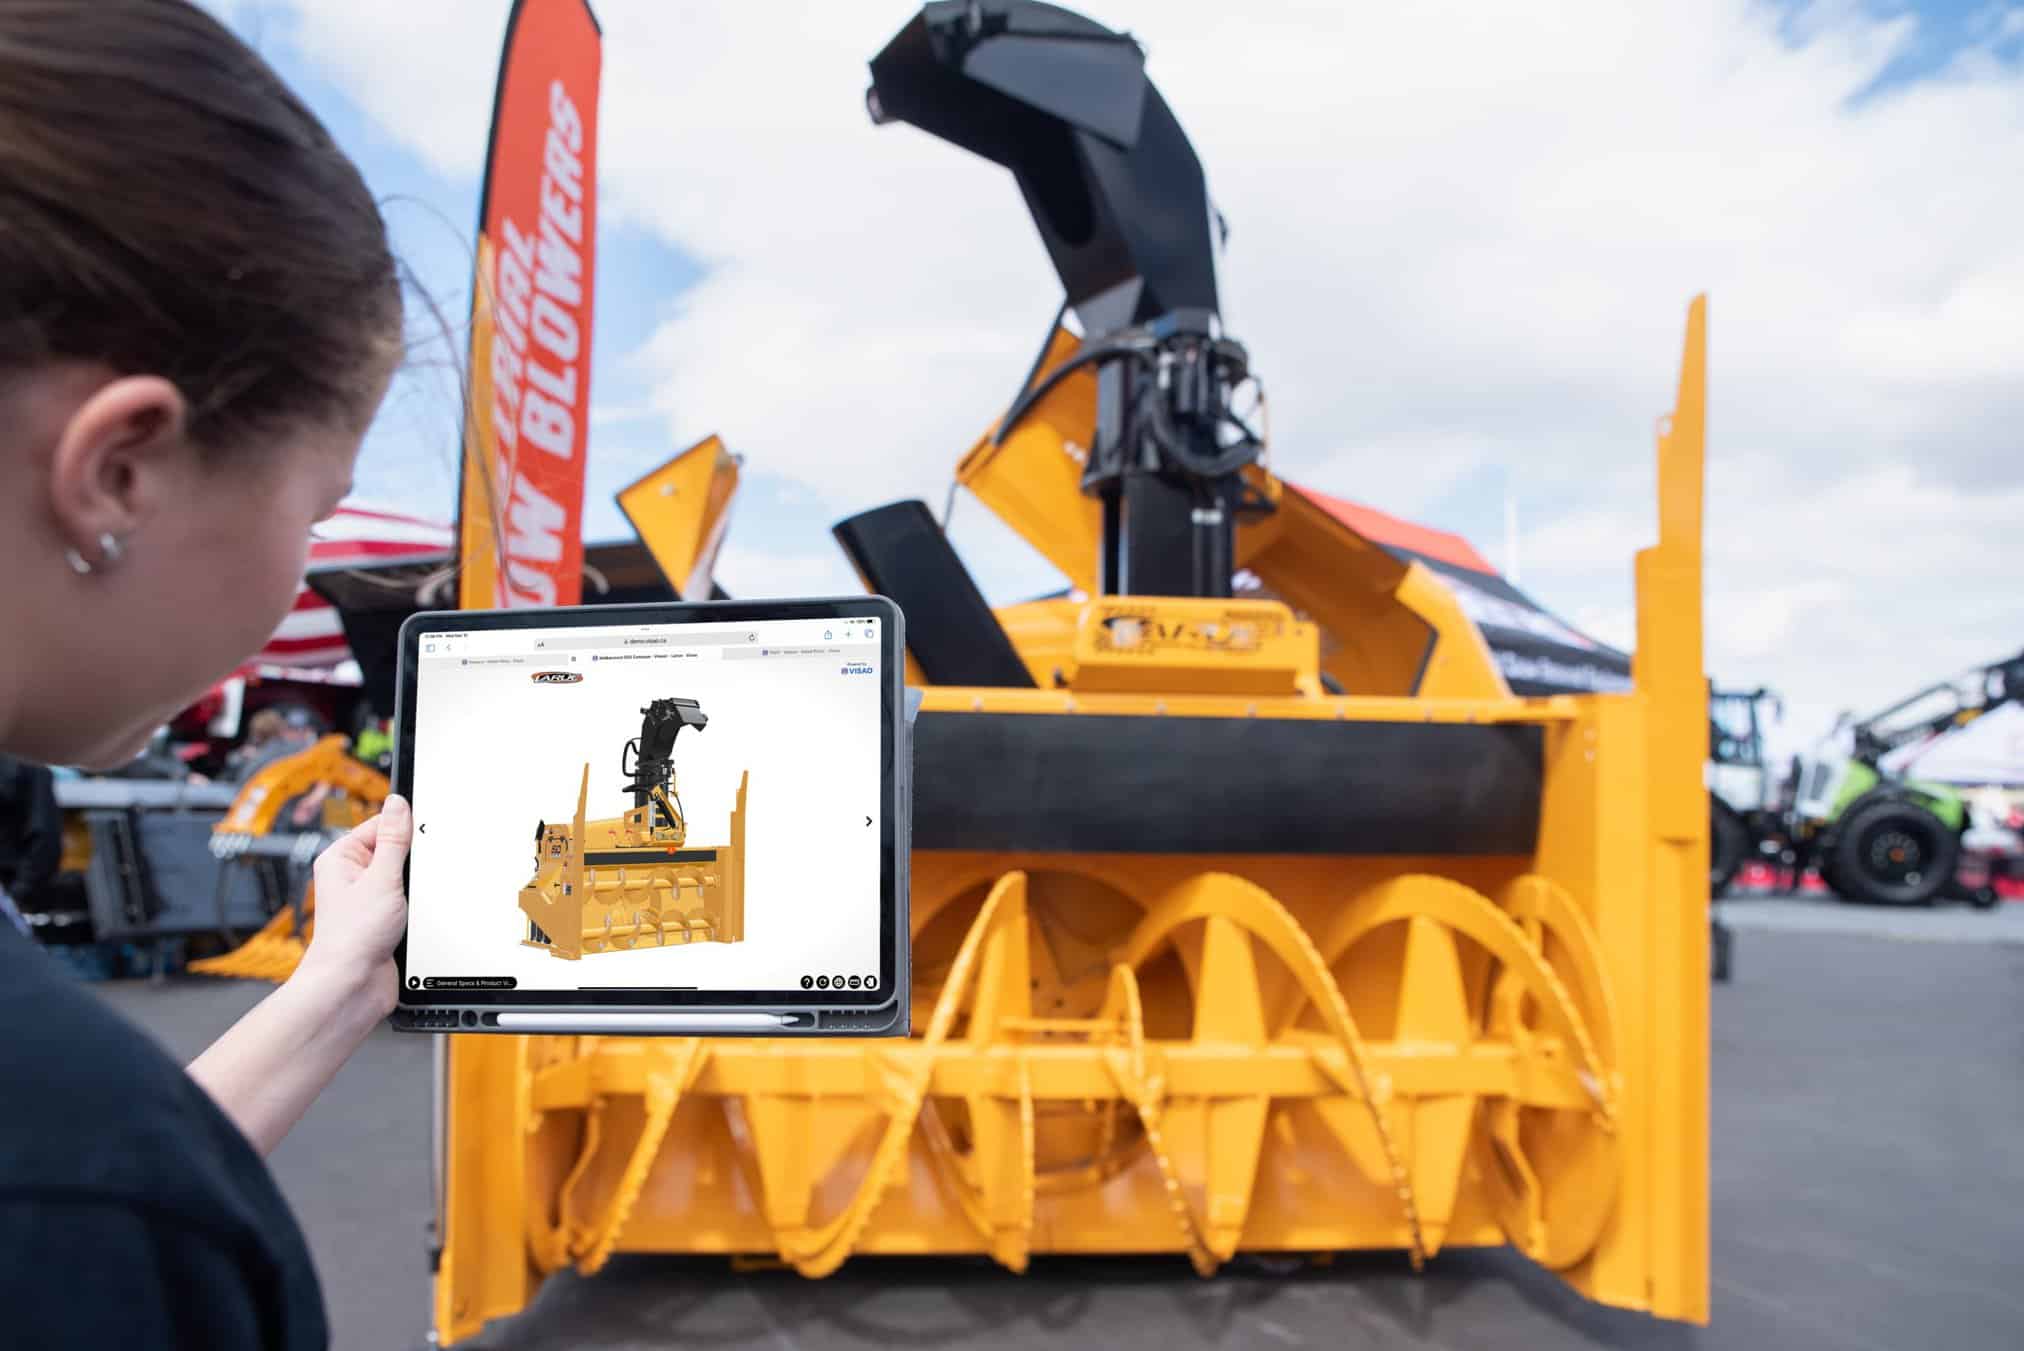
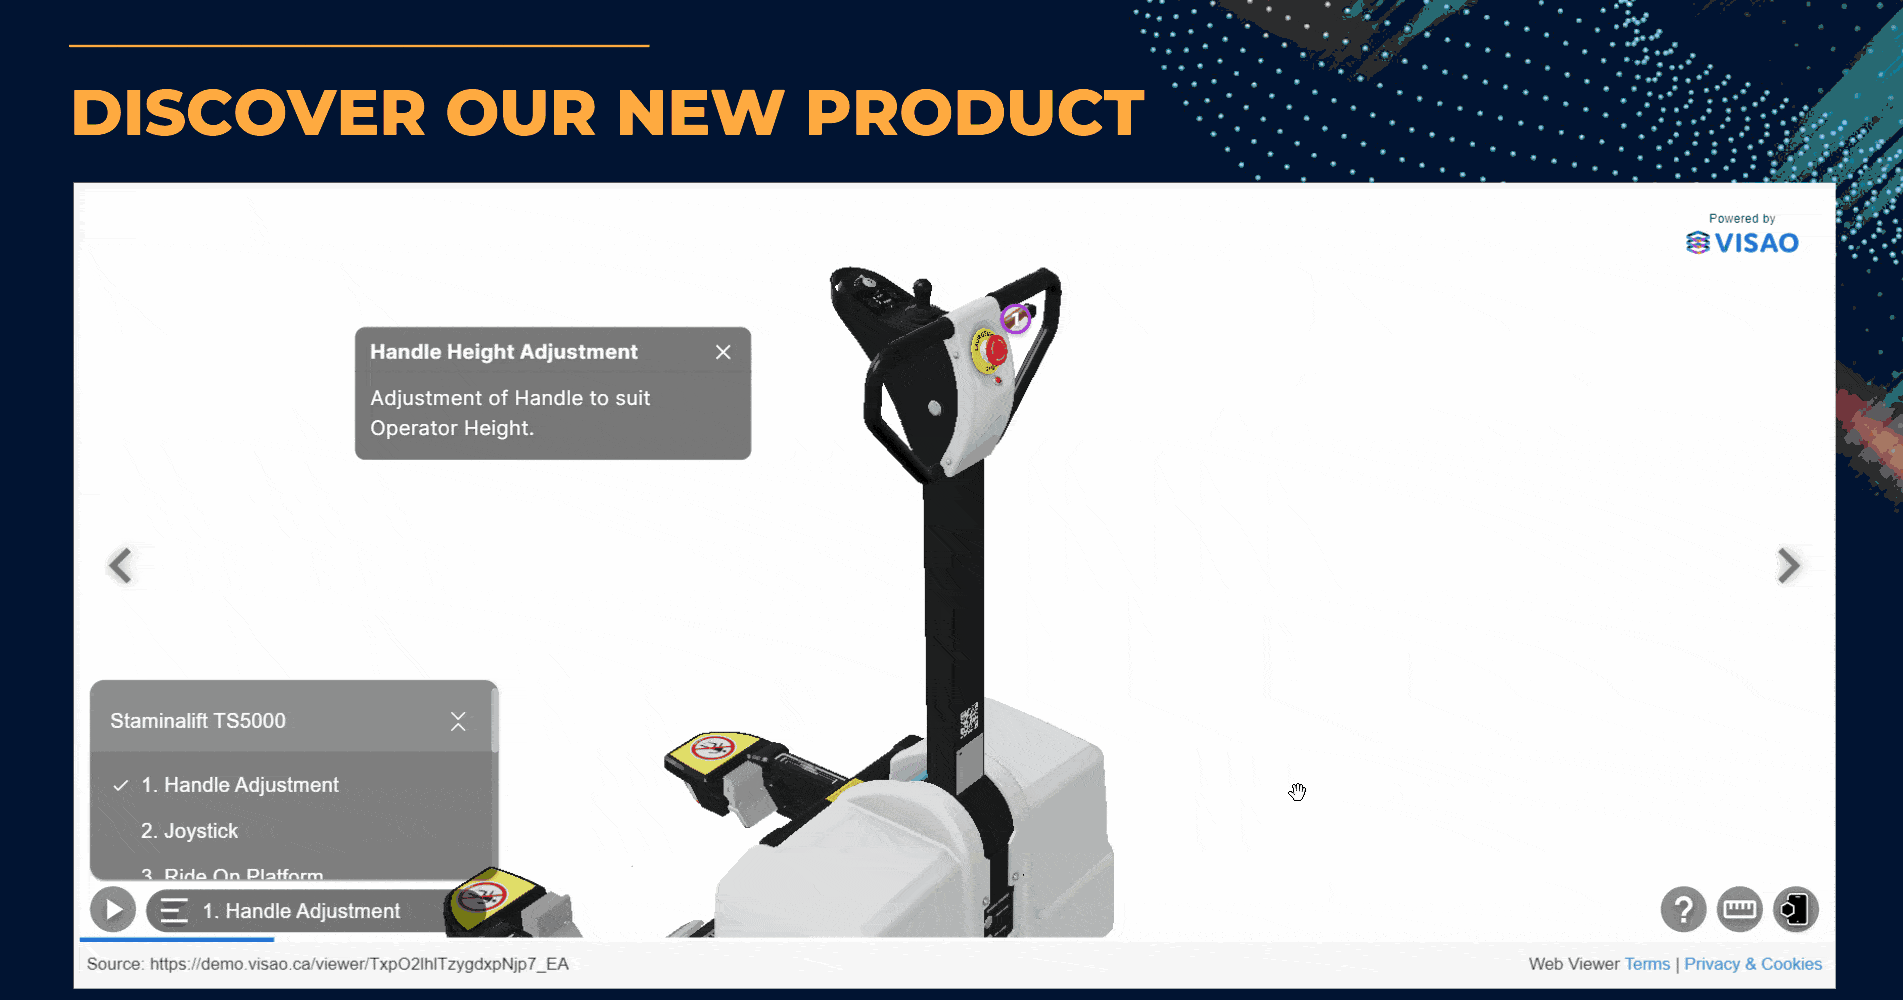
Navigate to the Powerpoint slide where you want to insert and embed the 3D viewer. Remember, your 3D viewer must be hosted on a separate URL link for easy embedding in Microsoft PowerPoint. Platforms like Visao‘s web platform allow you to embed a 3D version of your product effortlessly.

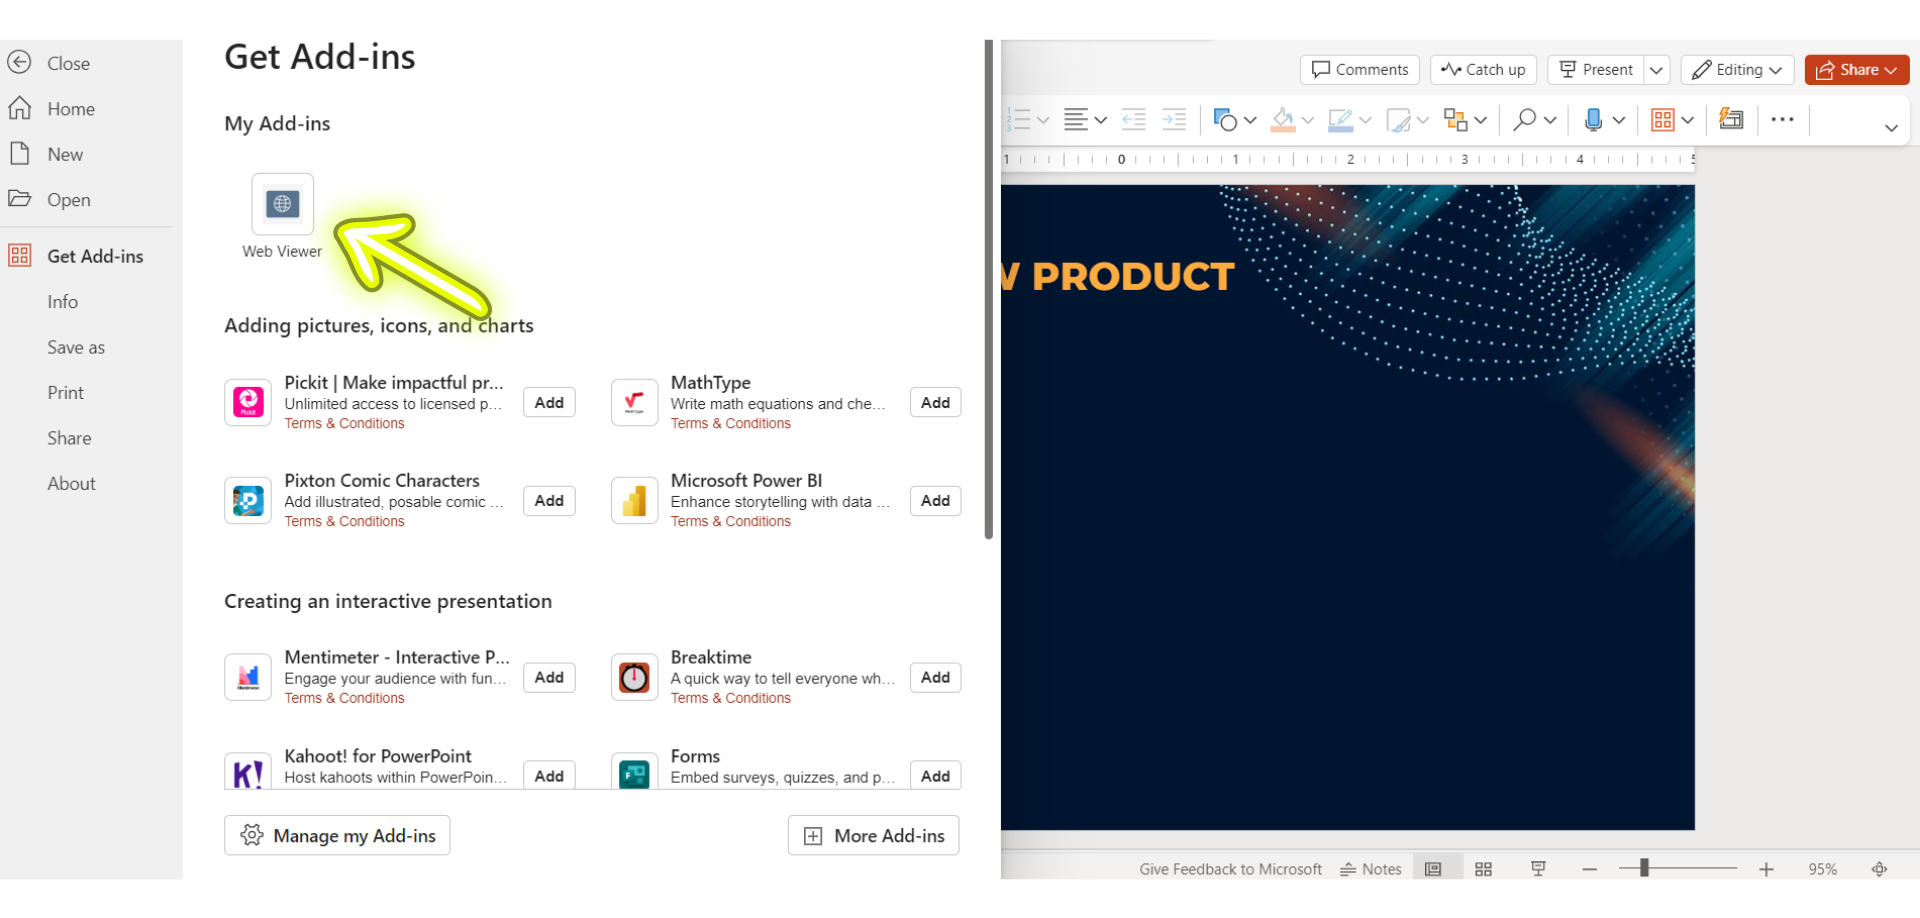
Step 4: Access the Web Viewer in My Add-Ins
Now that you’ve added the Web Viewer extension, go back to the File menu and hover over ‘Get Add-Ins.’ You should see an icon for the Web Viewer listed in the “My Add-Ins” section. Click on it to proceed.
Step 5: Enter the Web Hosted 3D Viewer URL
Clicking on the Web Viewer in the My Add-Ins section will add a white rectangle to your Microsoft Office Powerpoint slide. Within this dialog box, enter the URL of your web-hosted 3D viewer. Ensure you remove the ‘https://’ from the link for proper functionality.
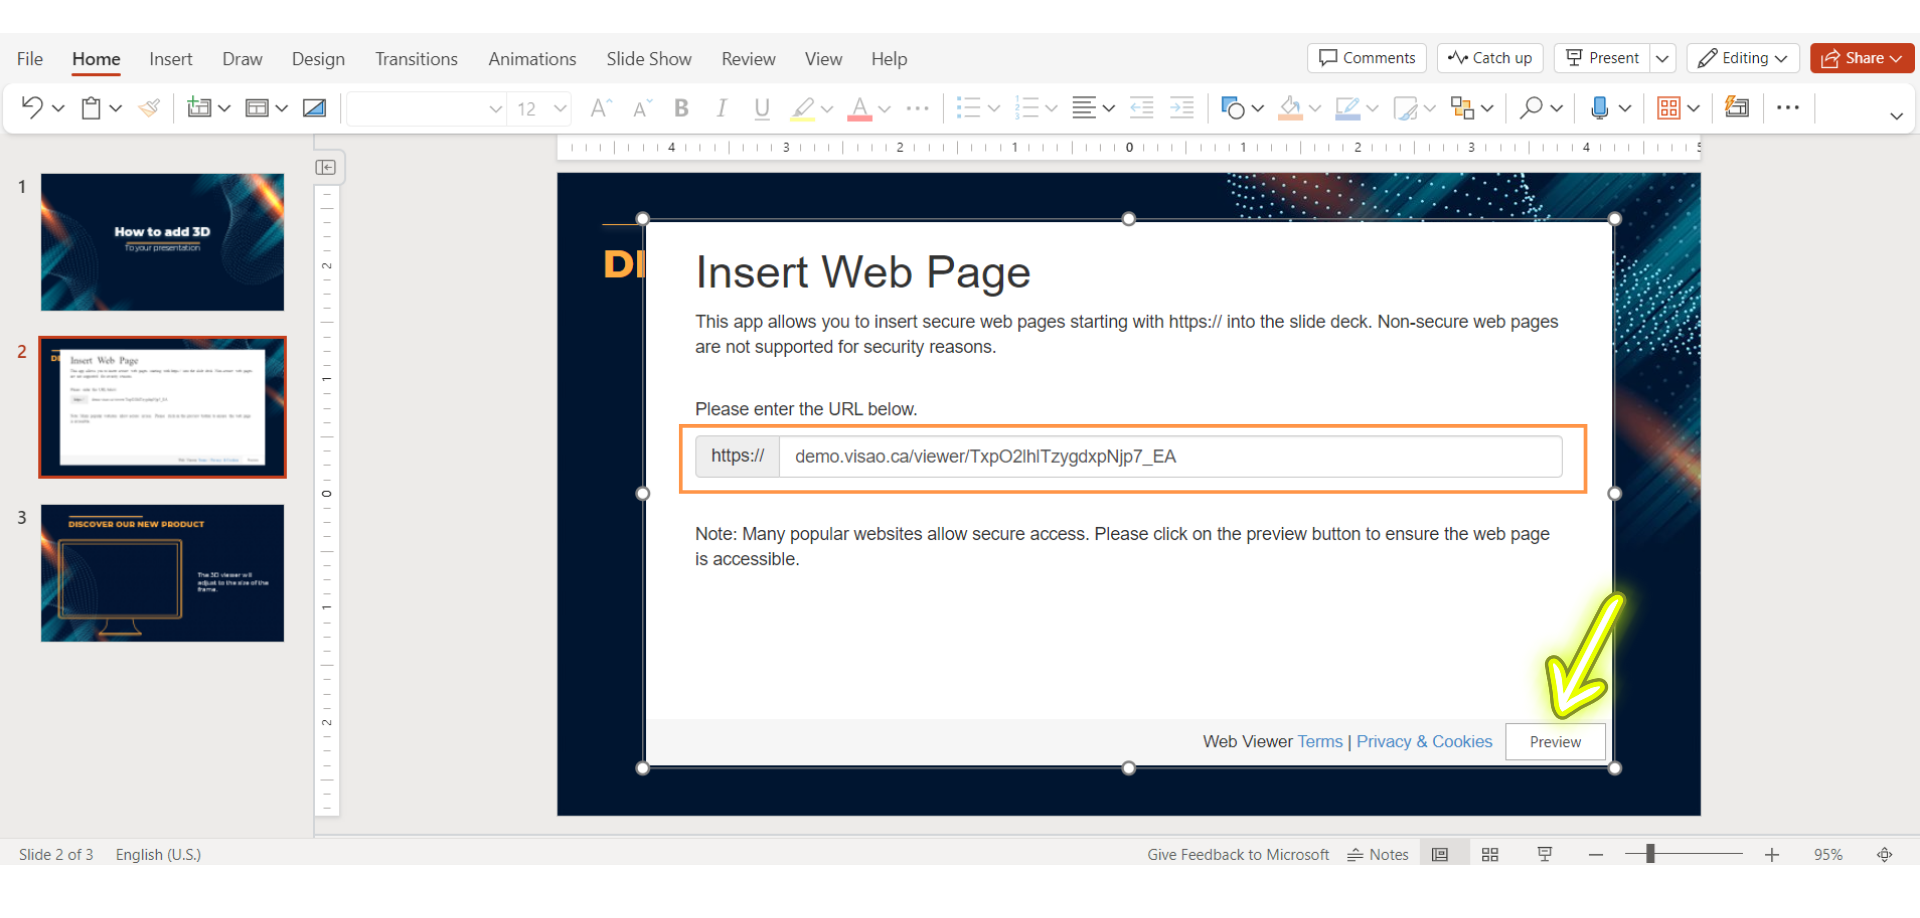
Step 6: Preview Your 3D Viewer
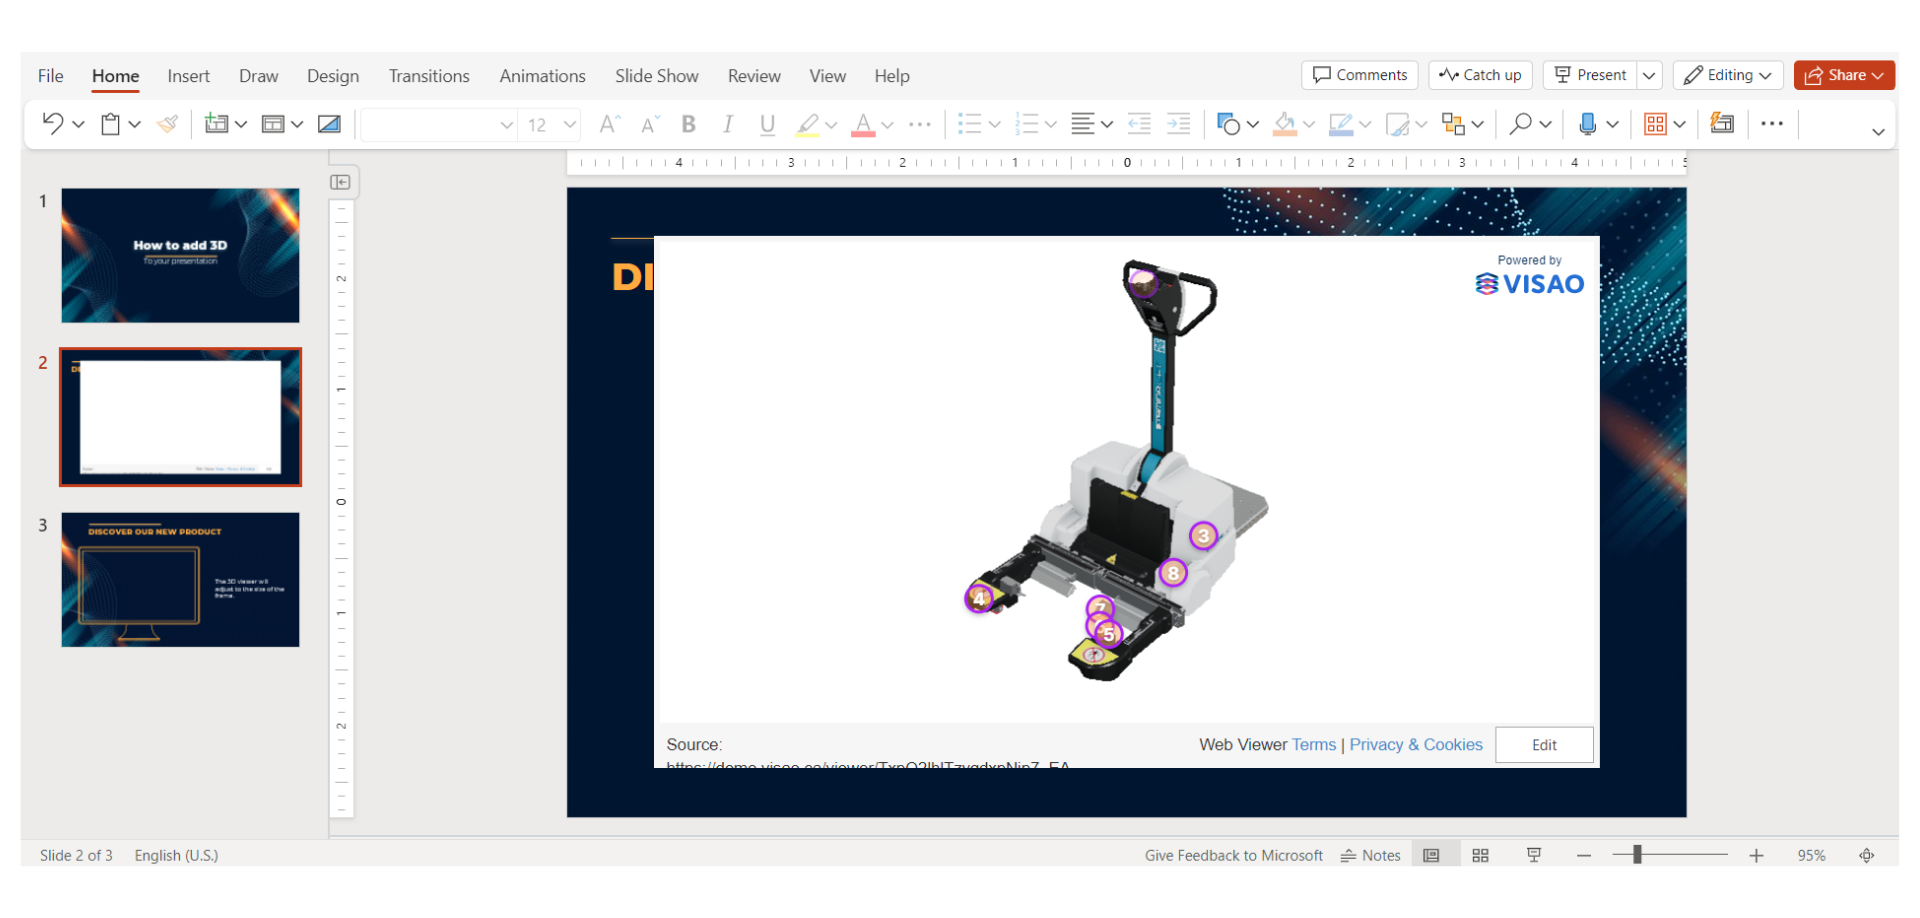
With the URL entered, click on the ‘Preview‘ button. Watch as your 3D model viewer magically appears within the white rectangle. Take a moment to interact with your 3D model.
Step 7: Customize the Size
To perfect the visual aesthetics, resize the screen to your liking. Adjust the dimensions of the 3D viewer element to seamlessly integrate it with your overall presentation layout.
Step 8: Present and enjoy your PowerPoint presentation
Click on ‘Present,’ and voila – enjoy the immersive experience of your interactive 3D animation elements seamlessly integrated into your PowerPoint presentation.
Need help integrating 3D into your presentation software?
Ready to elevate your presentations with seamless 3D integration? Look no further! Our expert team at Visao specializes in creating web-based three dimensional objects tailored to manufacturers of all industries and sizes. Transform your products into captivating 3D twins and redefine the way you showcase them to clients and distributors.
Reach out to us today, your presentations are about to get a whole lot more immersive!