Searching for the best app to infuse a sense of modernity and interactivity into product images featured on your Shopify store? Discover the power of 3D model viewers.
In just four simple steps, you can seamlessly embed these interactive and visually stunning tools into Shopify itself, transforming your product displays into captivating experiences. Gone are the days of complicated integrations or the need for specialized skills.
Forget product images; get ready to showcase your products to customers like never before and captivate your audience in real life with this cutting-edge technology.
But our integration prowess doesn’t stop at Shopify. Explore our blog posts on embedding for Wordpress, Duda, and Wix as well.
Understanding 3D model viewers for Shopify
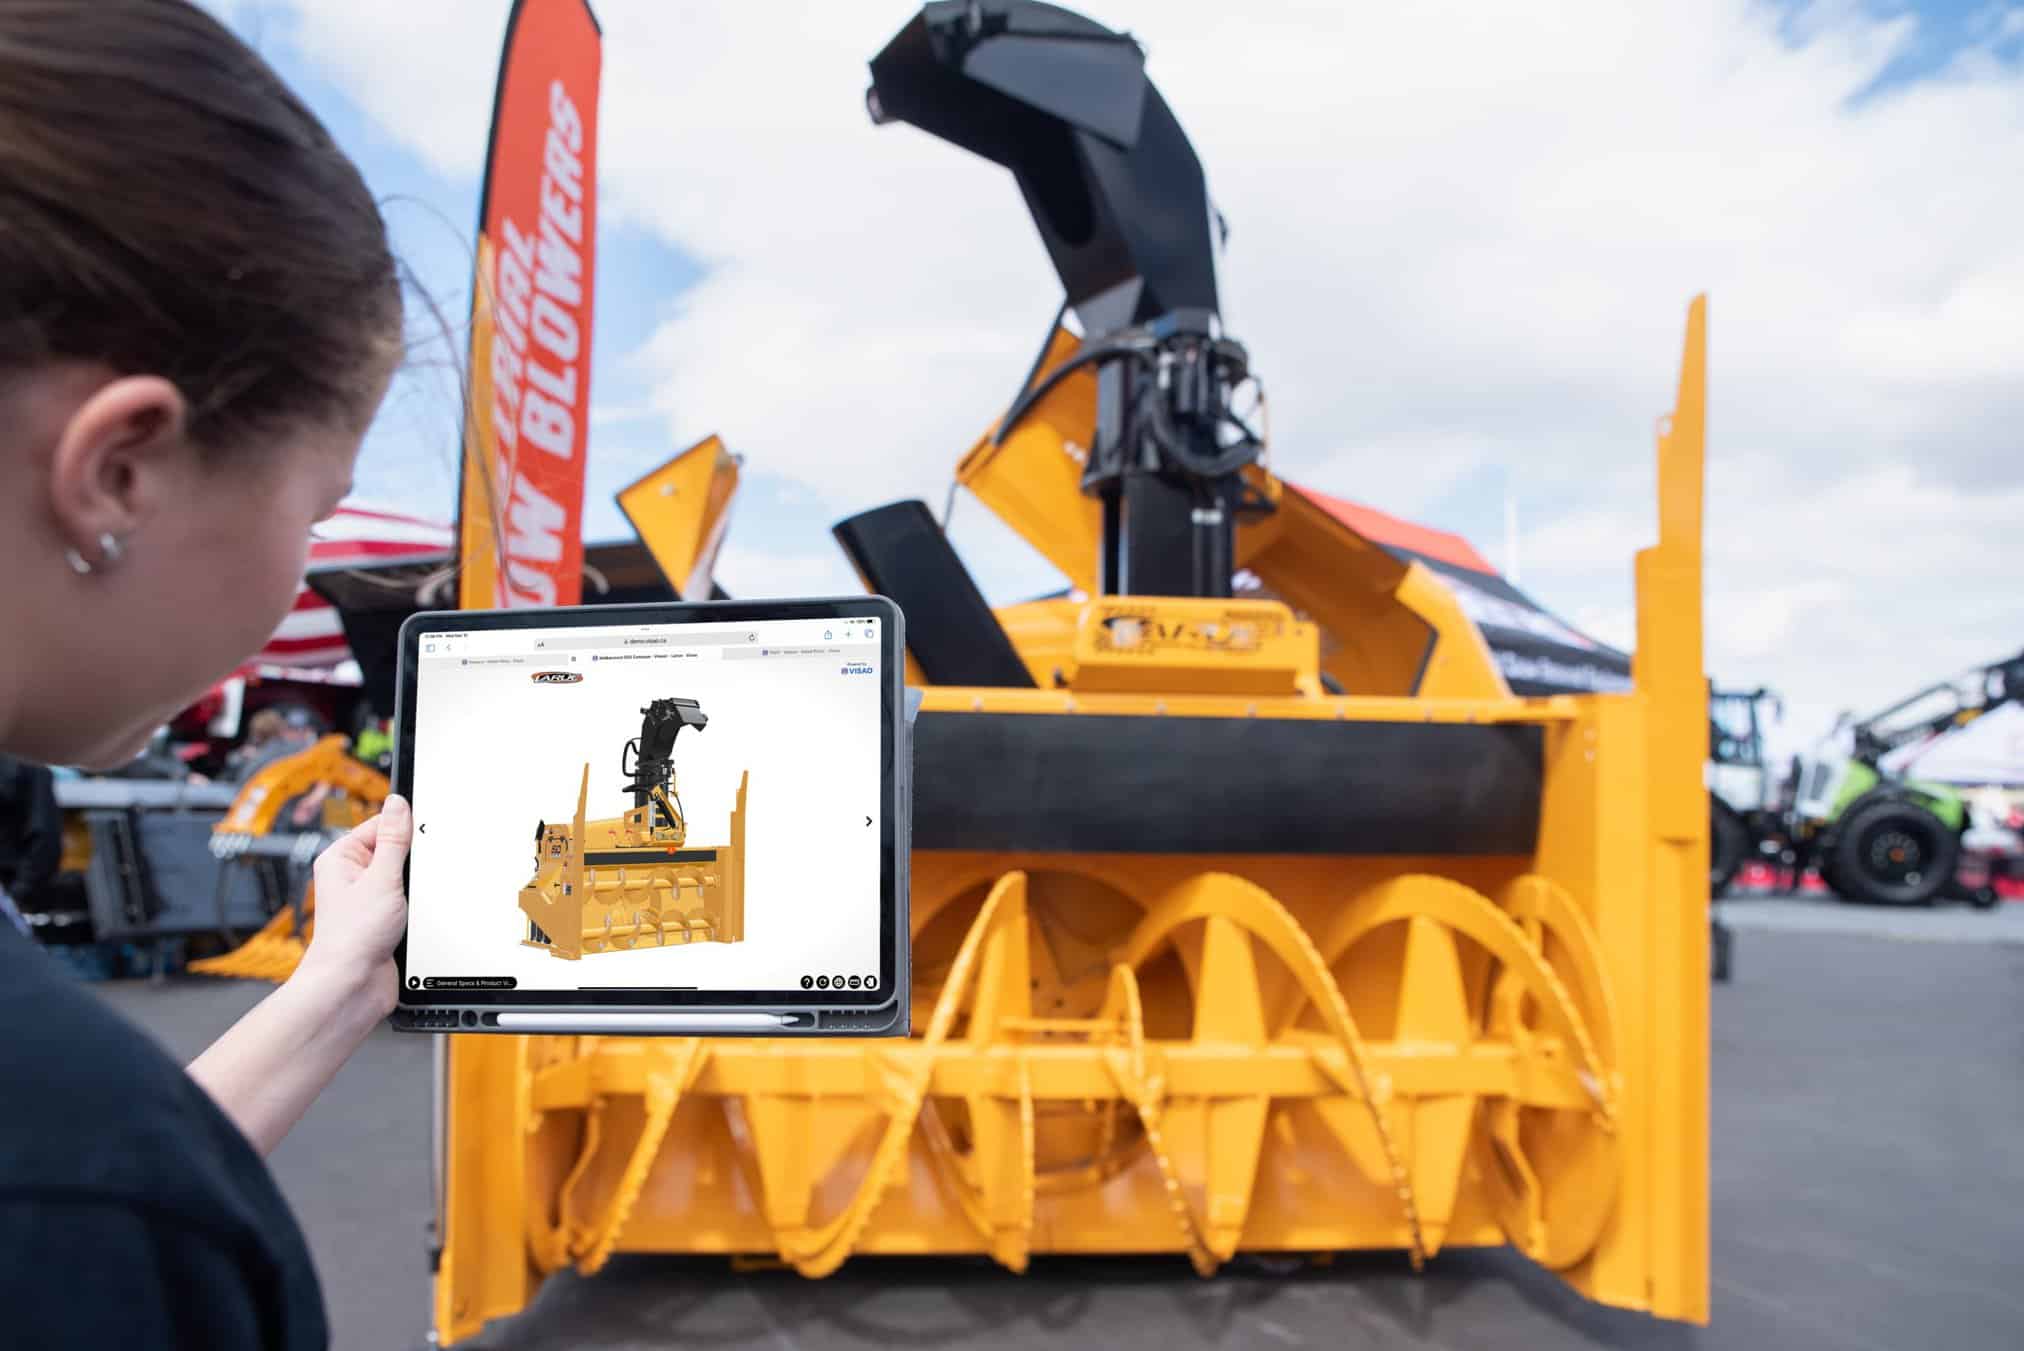
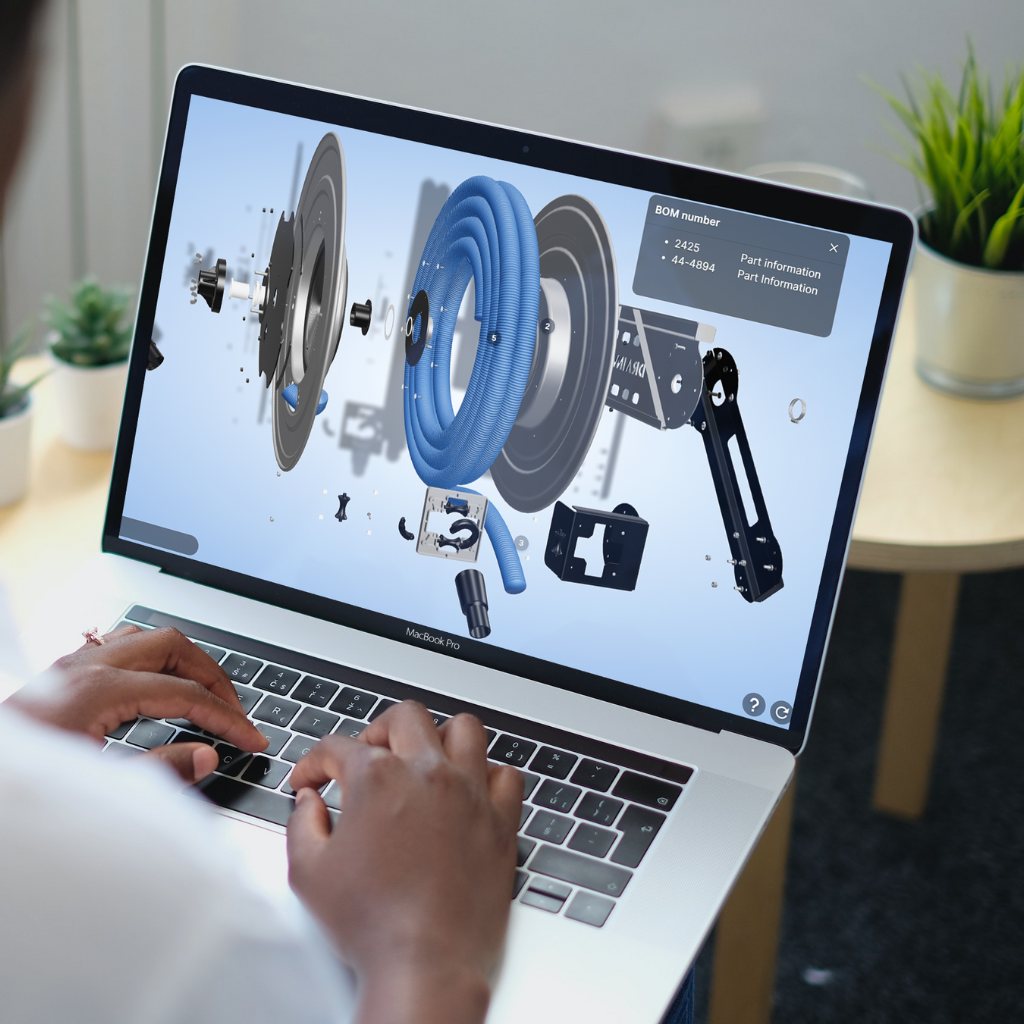
A 3D model viewer is a tool that enables customers to interact with products in a virtual space, offering a dynamic and immersive experience.
It allows users to manipulate, zoom, and rotate the product from different angles, providing a realistic representation and a deeper understanding of the product’s origin and its features than with product images. Try it out here:
Using 3D model viewers in e-commerce has significant advantages. They offer a more realistic representation of product media than traditional images, allowing customers to examine every detail.
Additionally, 3D model viewers enable better visualization, helping customers assess size, proportions, and aesthetics accurately. As an illustration, consider our client Drolet, who integrated digital replicas of their fireplaces on each product page.
By bridging the gap between online shopping and the in-store customer experience, 3D model viewers enhance engagement and create a memorable shopping journey.
Does an iFrame have an impact on SEO?
How to Get a 3D Model of a Product for Shopify ecommerce store
When it comes to showcasing your product media in a captivating and immersive way on Shopify store, having a 3D model is essential. So, how can you obtain a 3D model for your Shopify store?
Here are three options to consider, each with its technical requirements and its own advantages:
1. Make it Yourself
If you have experience and proficiency in 3D modelling, you can create your own 3D models using software like Blender. This option gives you full control over the design process, allowing you to customize the model according to your specific requirements. However, it requires a certain level of expertise in 3D modelling software and can be time-consuming, especially if you are new to the process. Hosting these models also requires some technical knowledge and infrastructure setup to ensure they load smoothly on your website.
2. Hire a 3D Design Shopify Agency
If you don’t have the necessary skills or time to create 3D models yourself, partnering with a 3D design Shopify agency is a viable option. These agencies specialize in providing 3D modeling services tailored for Shopify apps. While this option may be more budget-friendly, it typically offers limited customization and may not achieve the highest quality results.
3. Partner with an External Software Specialized in Creating 3D Model Viewers
For a truly immersive and feature-packed 3D experience on Shopify, teaming up with an external web app specialized in crafting 3D model viewers is your winning strategy. These companies excel in delivering tailored solutions that transcend standard 3D integration. With advanced features like customizable backgrounds, dynamic product animations, interactive elements, voiceovers, and much more, they take your online store to the next level.
Discover one right here!
Partnering with a partner like Visao ensures that you can access a wide range of customization options ( think physically based rendering technology and AR technology!), enhancing the overall user experience and setting your Shopify store apart from the competition.
Adding a Shopify 3D model viewer for product media
Here’s a step-by-step guide to help you embed a 3D viewer on your Shopify product page:
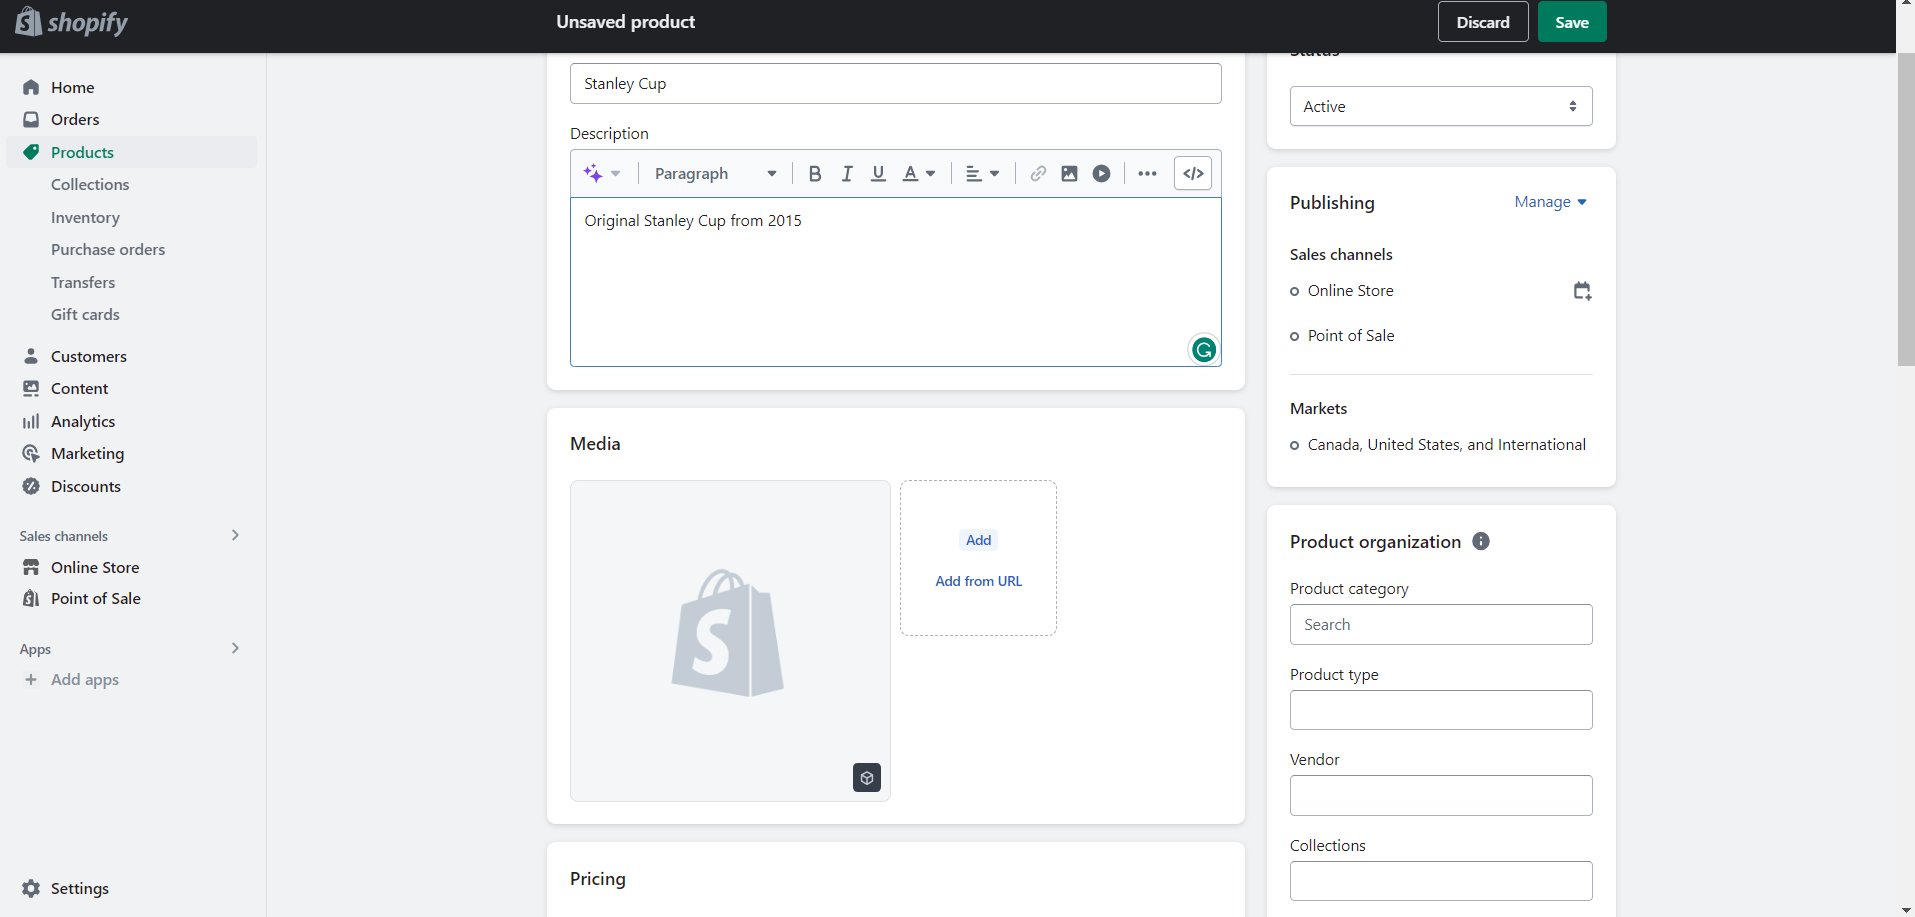
Step 1: Access the Shopify store admin dashboard and navigate to “Products” and then “All products.”
Step 2: Choose the specific product that you want to edit and click on its name.
Step 3: Under the “Media” section, upload your 3D model file.
Pro Tip 1: For optimal performance, it is advisable to utilize .GLB file format for your 3D product media, ensuring that the file size remains within the range of 6MB or smaller, with a maximum limit of 15MB.
Pro Tip 2: It is crucial to include alt-text for your different media formats. Alt-text functions as an alternative description displayed in case the media fails to load. This not only enhances accessibility for visually impaired potential customers but also contributes to improving your website’s search engine optimization (SEO).
Upon completion of the aforementioned steps, you will find the embedded 3D product media seamlessly integrated into your product’s media carousel.
Take a look at an example of how one of Visao‘s clients effectively incorporated their sports car rack directly into their product carousel.
Limitations concerning Shopify’s built-in tool
It’s worth noting that while Shopify’s built-in tool allows for the basic embedding of 3D models, there are certain limitations. For instance, you cannot customize the theme editor (3D model icons) directly using the tool. Instead, you must rely on the Shopify app’s display settings.
What’s more, you can’t add annotations or custom animations to the product; you can only visualize a 360 view of the product.
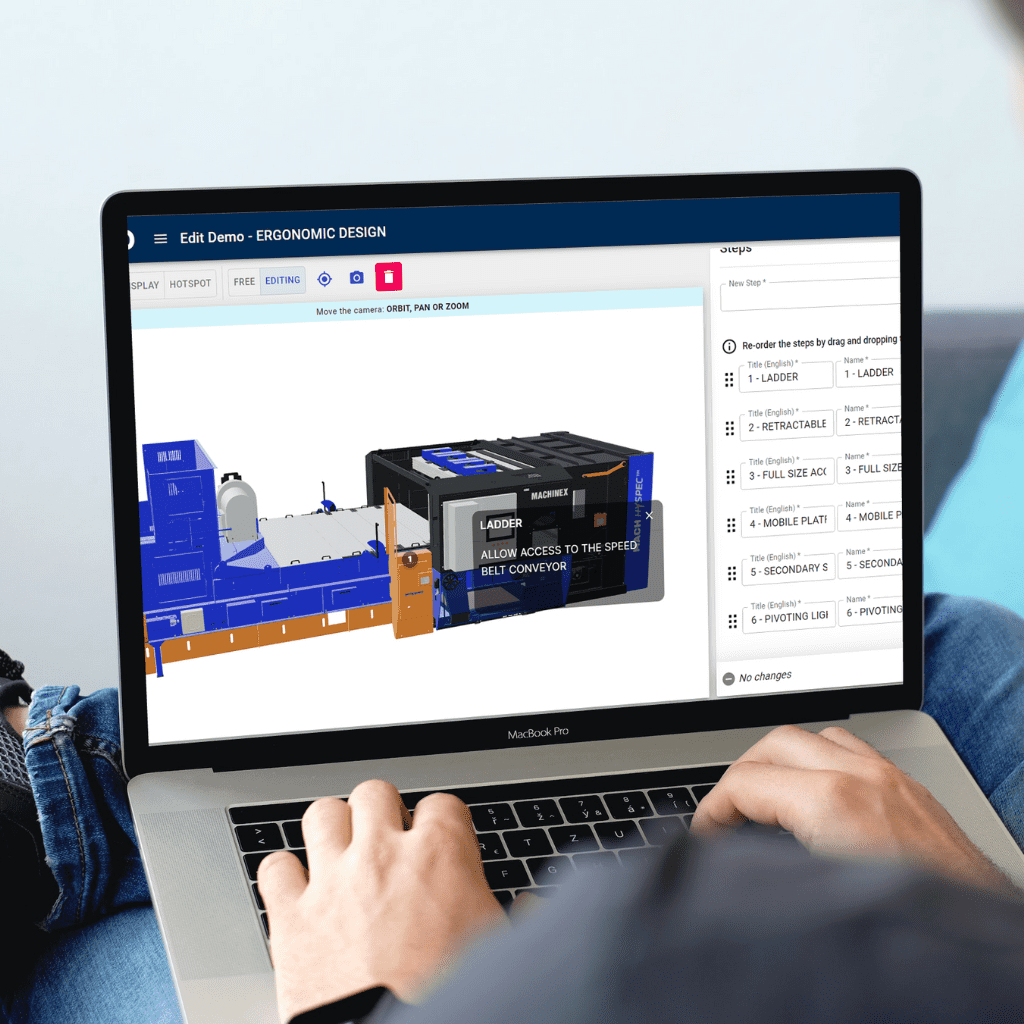
For a fully customizable 3D experience with features like background changes, product details, animations, and step-by-step guidance, partnering with Visao‘s 3D viewer platform provides an ideal solution, ensuring exceptional visual accuracy.
Visao empowers you with full command over your 3D viewer, opening up endless customization possibilities, including UV layout and single texture map features, to elevate the user experience. Ready to explore the next level? Dive into our cutting-edge 3D product configurator technology.
Embedding a 3D Viewer on a regular Shopify Page
This section explains how to embed a 3D model viewer on a regular page using Shopify’s CMS.
PART 1: Obtaining your HTML content
A. Understanding what an HTML iframe is
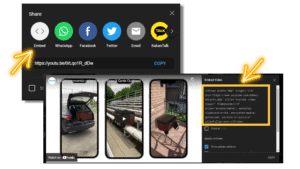
The best and easy way to showcase a 3D product viewer on a webpage is by using an HTML iframe. An iframe is a frame that displays an HTML page inside another page. In the example below, an iframe embeds video files video in this blog post.
B. Understanding what are its elements and options
This illustration depicts the different elements of an iframe code built to support 3D web elements. In the vast majority of cases, it is not necessary to modify any part of the iframe settings.

Visao’s 3D experts recommend using the full width and height of the HTML container rather than determining fixed dimensions in pixels. That is why the example above uses style=”width: 100%; height: 100%”.
However, if you prefer to edit the height and width of the 3D model viewer, you can give specific pixel attributes to each element. Here is an example with a width of 600 pixels and a height of 450 pixels (style=”width:600; height: “450”).
What does a product configurator do?
C. Copy the HTML content
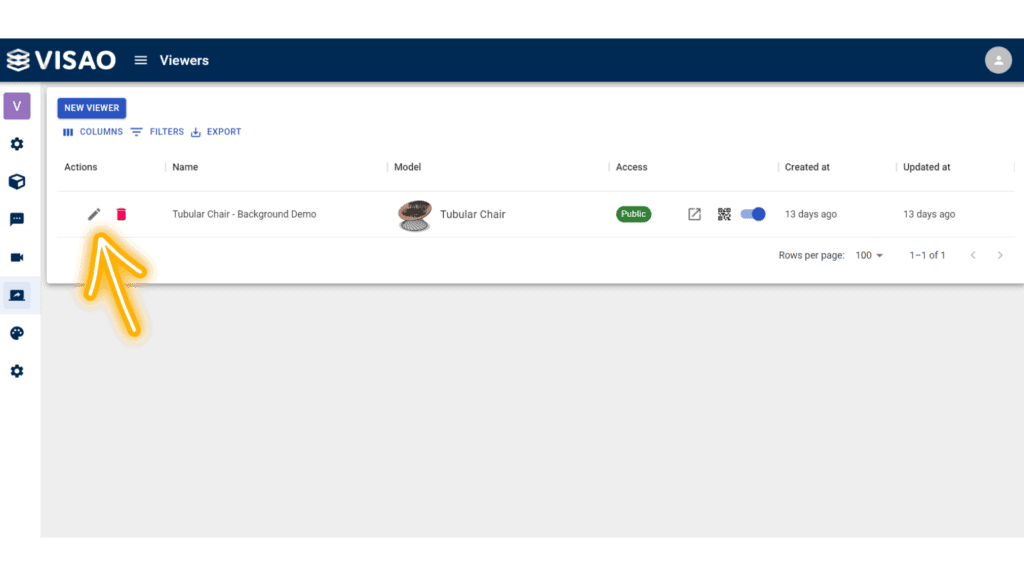
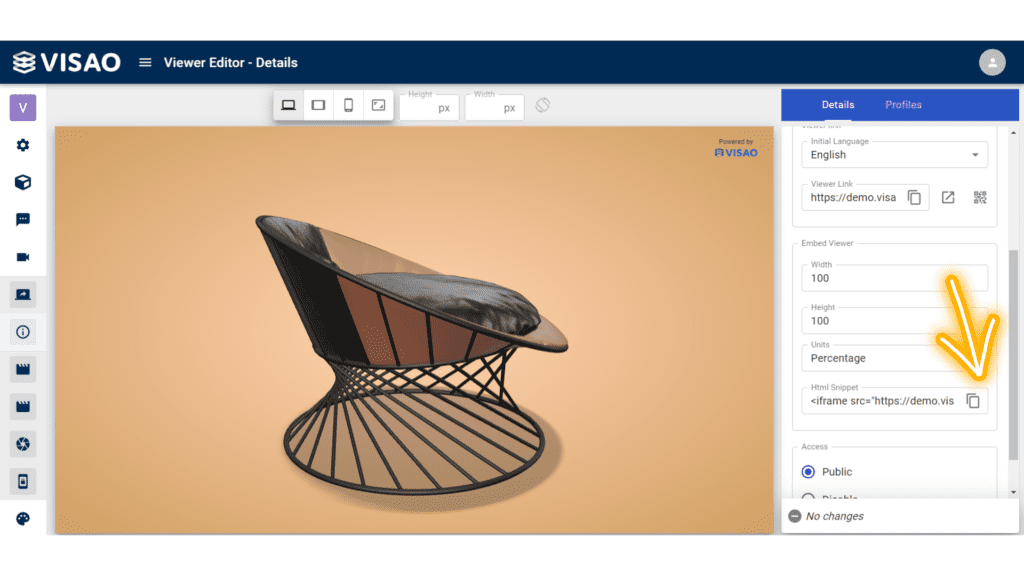
If you use Visao’s 3D product viewer creation platform, your iframe code will be generated automatically. To access it, in the “Viewer” section of the platform, simply click on the “Edit” icon. Then click on the copy icon on the right to copy the generated iframe code.
If you are not using Visao’s platform, you can use the following template. Just replace the model URL with your own.
<iframe src=”https://demo.visao.ca/viewer/nvx7YBzcT7CrZMp9ubwg5A?lang=en” title=”Tubular Chair – Background Demo” style=”border: none; width: 100%; height: 100%;” allow=”autoplay; fullscreen; vr” allowtransparency=”true” allowfullscreen=”true”></iframe>
PART 2: Embedding the 3D content on the website
To integrate the 3D content into your Shopify website, you need to paste the generated iframe code into the corresponding section of the website.
A. Login your Shopify dashboard
Go to your account to edit the website.
B. Select the page
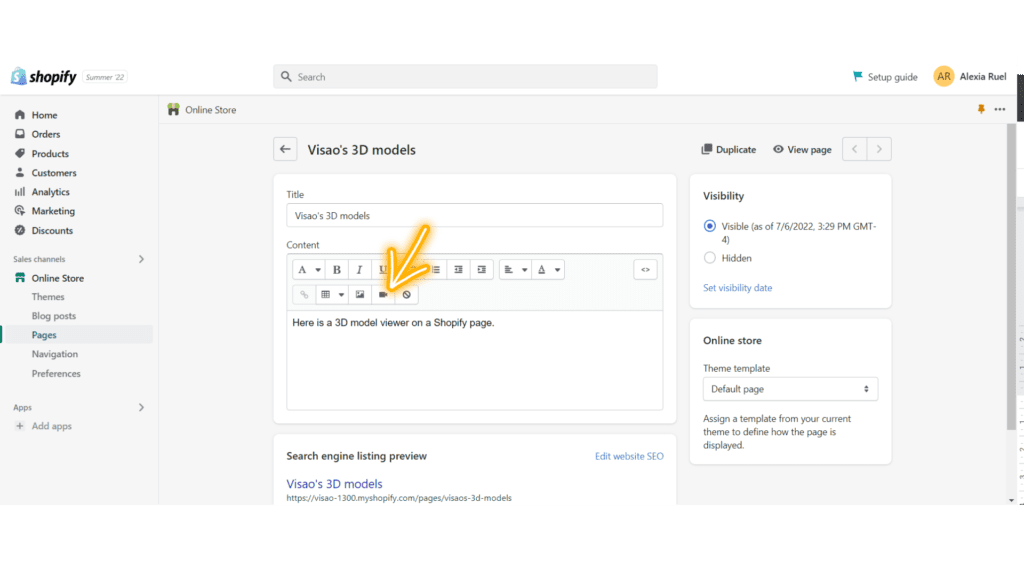
From the left-hand menu, navigate to Online Store>Pages. Click on the page you would like to add your 3D model viewer.

C. Click the “Insert video” icon and paste the iframe code
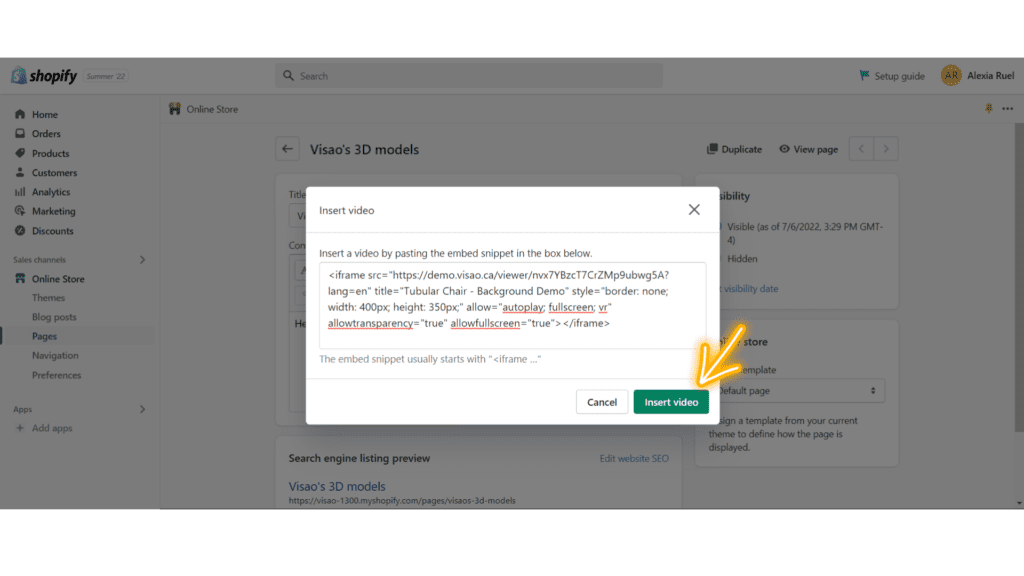
Click on the video camera icon where you want to add the 3D model viewer. A popup will appear where you have to paste the html code. Click on the “Insert video” icon.
D. Review and click “Save” to see the results
Save your changes by clicking on the “Save” button. Now your 3D model viewer will appear on your Shopify store page!
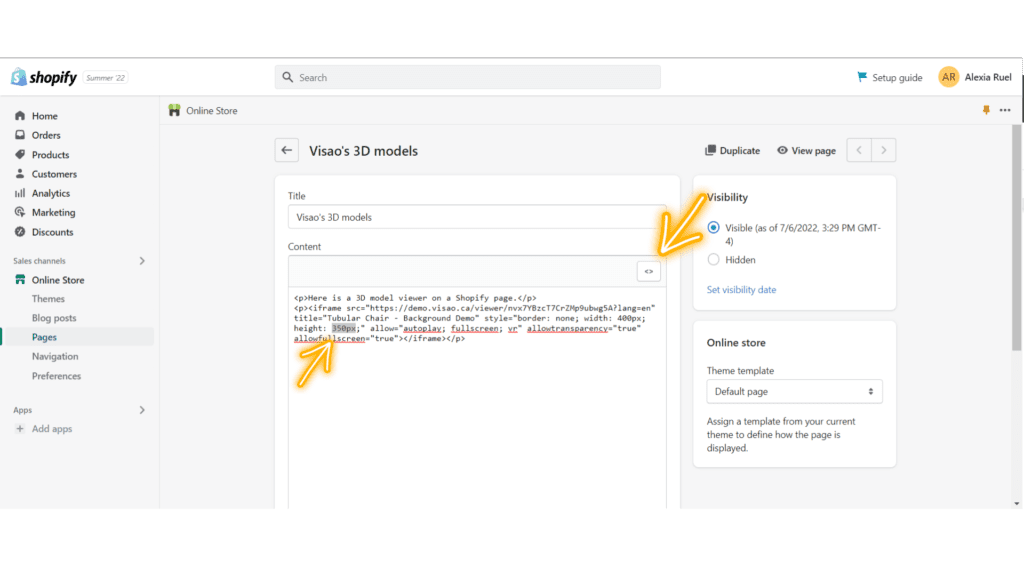
E. Editing the width and height of your 3D model viewer directly in Shopify store
If you need to customize the dimensions of the iframe, the recommended method is to click on the “Show HTML” icon.
This action will display the HTML code, allowing you to modify the height and width parameters accordingly.
Two tips for optimizing the 3D viewer experience for ecommerce stores
1. Optimize Model File Sizes
Ensuring the best mesh quality is crucial to improve loading times and ensure smooth interactions with your 3D models. Make it a priority to enhance polygon counts and ensure the model conforms to streamlined geometry while maintaining high overall quality standards.
Moreover, consider compressing textures and investigating the utilization of efficient file formats such as glTF or USDZ.
2. Offer Contextual Information:
Accompany the 3D model viewer with relevant contextual information. Provide descriptions, specifications, or product details alongside the viewer to enhance the user’s understanding and engagement. For example, if you’re showcasing a piece of furniture, include details like its dimensions, materials, and color options. This helps users understand and engage with the product better.
Consider integrating links or buttons that allow users to access related products, resources, or purchasing options easily.
Ready to use 3D and augmented reality?
Embracing technologies like 3D model viewers can set your online store apart from competitors, boost sales, capture the attention of your target audience, and contribute to your business’s long-term success.
To take your e-commerce experience to the next level, we encourage you to explore external 3D model viewer web applications like Visao. These platforms offer advanced features, AR functionality and customization options that can further elevate your website’s visual appeal and interactivity.
Experiment with augmented reality, different configurations, test various viewer settings and continuously optimize your 3D models and content to provide an exceptional shopping experience for your customers.